 Doc Summary

Single sign-on lets your users sign in to Symbiant with their Microsoft work account instead of a separate password. This article shows how to set up the Symbiant app in Microsoft Entra ID (formerly Azure Active Directory).
Note: Single sign-on (SAML SSO) is a premium add-on. It is not included as standard in any Symbiant plan. Contact your account manager to add it.
Critical: With single sign-on, the sign-in email address is case sensitive. The email address on each Symbiant user must match the case in your directory exactly. For example, [email protected] and [email protected] are treated as different people. Symbiant creates each user’s single sign-on identity from their email address.
What Symbiant Support Will Give You #
When you order single sign-on, Symbiant Support sends you three values for your system. They look like this:
| Value | Example |
|---|---|
| Entity ID (Identifier) | urn:amazon:cognito:sp:eu-west-2_example |
| Reply URL (ACS URL) | https://example-symbiant-app-login.auth.eu-west-2.amazoncognito.com/saml2/idpresponse |
| Sign-on URL | https://example.symbiant.cloud |
Creating the App #
- Sign in to the Microsoft Entra admin center or the Azure portal as an administrator.
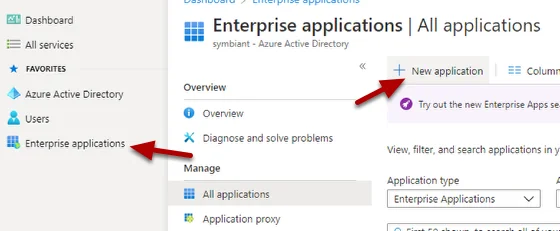
- Go to Enterprise applications and click New application.
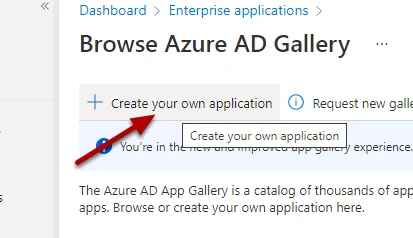
- Click Create your own application.
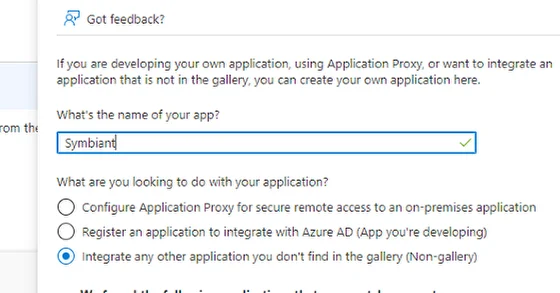
- Name the app Symbiant and choose Integrate any other application you don’t find in the gallery (Non-gallery).
- Click Create.
Choosing SAML #
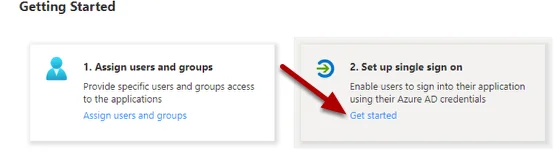
- Under 2. Set up single sign on, click Get started.
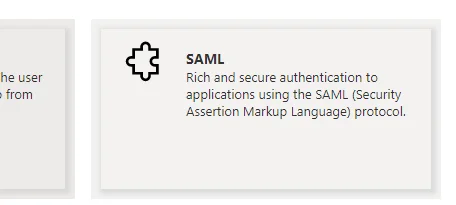
- Click SAML.
Entering the Basic SAML Configuration #
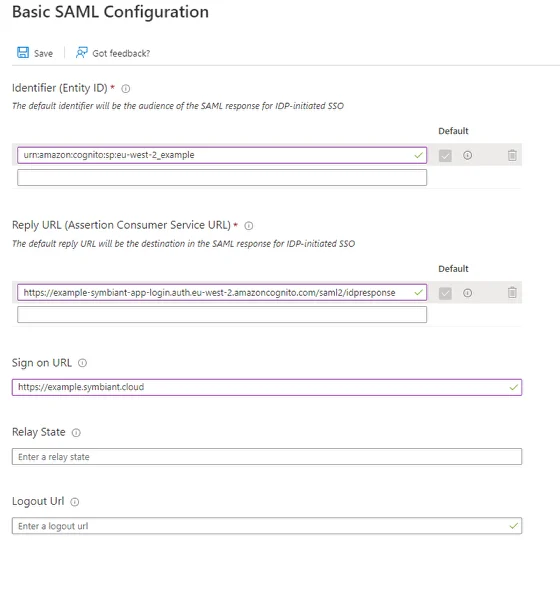
- Click the edit pencil on Basic SAML Configuration.

- Delete any default values.
- Enter the three values from Symbiant Support: the Identifier (Entity ID), the Reply URL and the Sign on URL.
- Click Save.
Setting the Unique User Identifier #
- Click the edit pencil on Attributes & Claims.
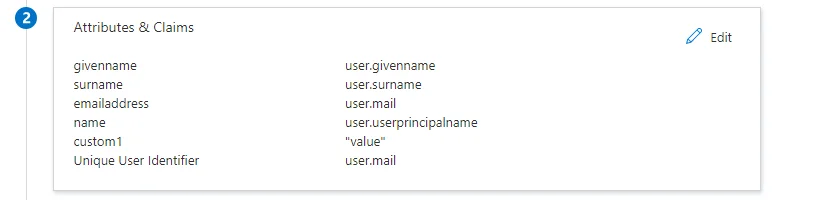
- Click Unique User Identifier.
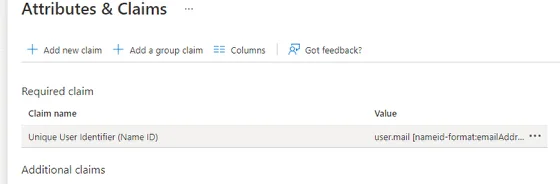
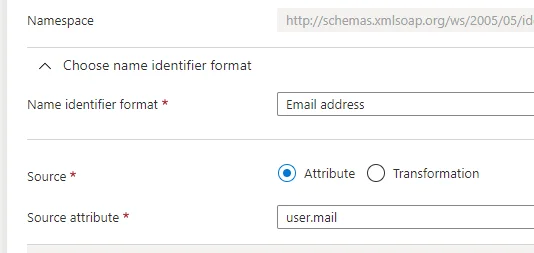
- Set Source attribute to
user.mailand save.
Adding a Custom Claim (Only If Support Asks) #
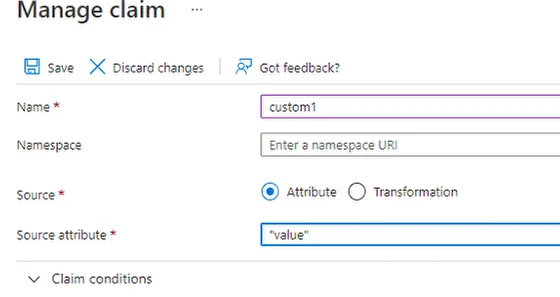
- Under Attributes & Claims, click Add new claim.
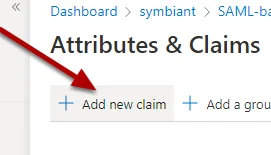
- Enter the Name that Symbiant Support gave you.
- Set Source to Attribute.
- In Source attribute, enter the value Symbiant Support gave you, then click Save.
Giving Users Access #
Assign the users or groups who should use Symbiant to the app (Users and groups > Add user/group). Anyone not assigned will see error AADSTS50105. See SAML Azure Errors.
What to Send Back to Symbiant Support #
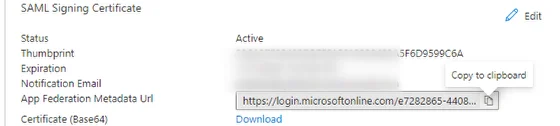
Copy the app’s Federation Metadata URL and send it to us in a support ticket. We’ll finish the set-up and let you know when single sign-on is ready.
Once it is ready, turn on single sign-on for each user.