 Doc Summary

How to add filters to a report so it only includes the records you need, and how to save the filter as a preset.
Applies to: Users with access to Reports · Module: Reports
Opening a Report’s Filter #
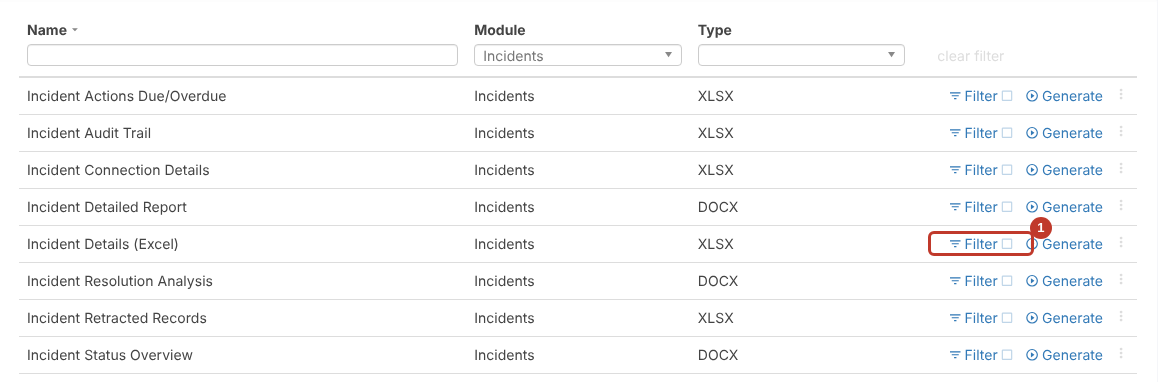
- Go to Reports and find the report you want to filter.
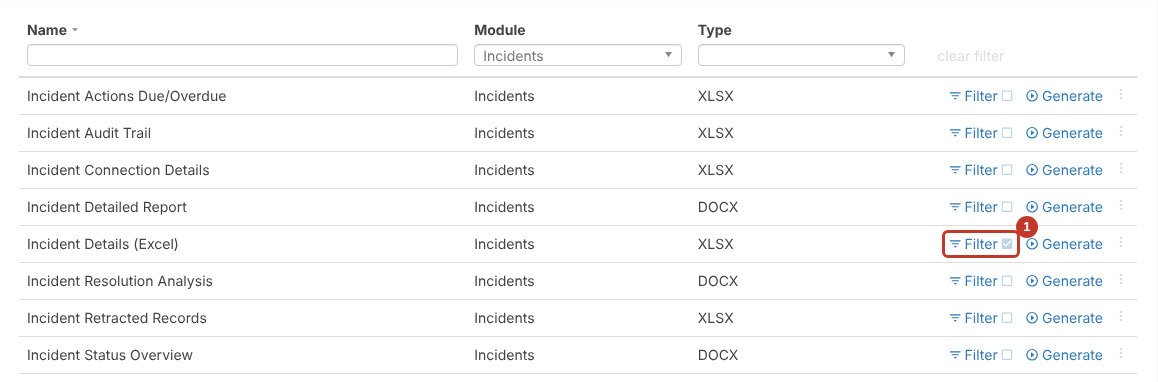
- Click Filter next to it (1).
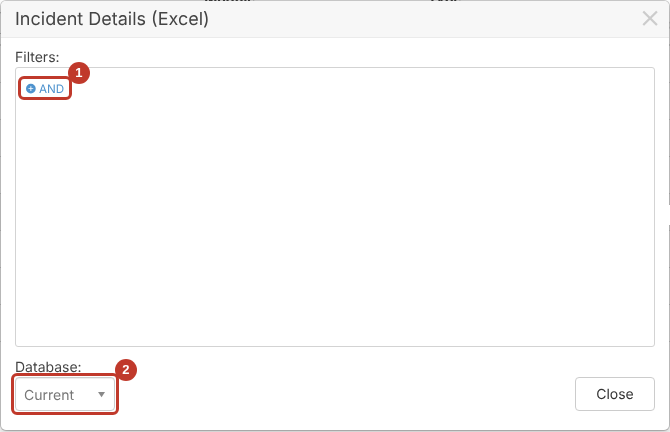
The filter panel opens. Click + AND (1) to add a condition. The Database option (2) is explained further down.
The report filter works in the same way as the dashboard’s Filter Editor. See Advanced Filtering for a full guide to fields, operators and values.
Filtering on a Dropdown Field #
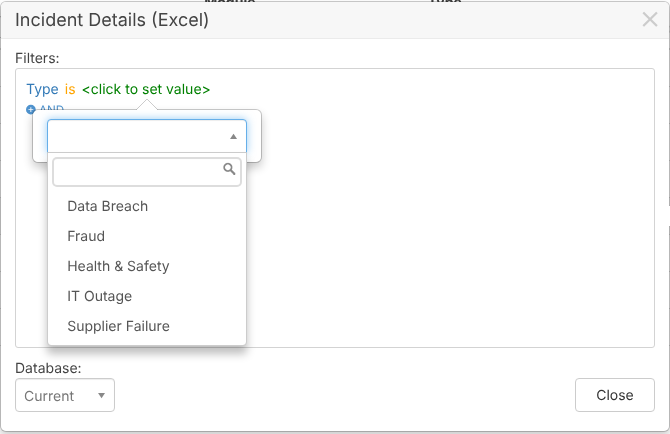
- Click + AND, pick a dropdown field such as Type, then Select.
- Click <click to set value> and pick the value from the list, for example IT Outage.
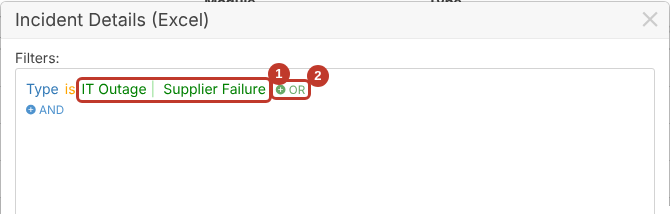
- To include more values for the same field, click + OR and pick another value. Here the report includes IT Outage or Supplier Failure (1). Click + OR (2) to add more.
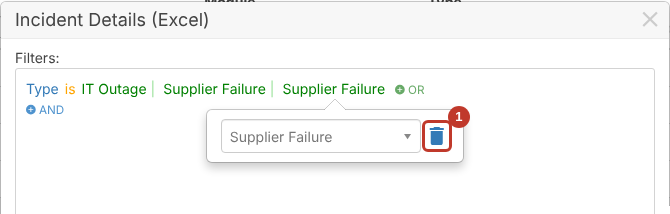
To remove a value, click it and then click the bin icon (1).
Filtering on a Date #
- Click + AND and pick a date field, for example Occurred.
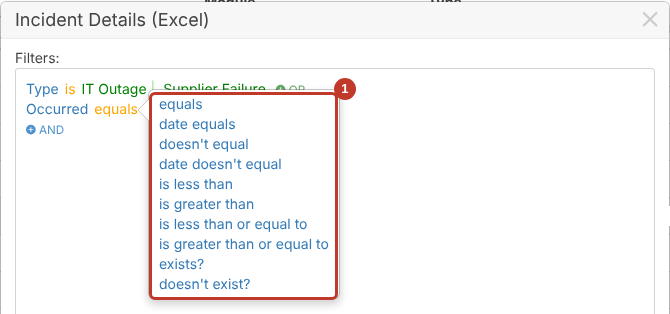
- Click the operator (equals) to change how the date is compared (1). For example, choose is greater than or equal to to find records on or after a date.
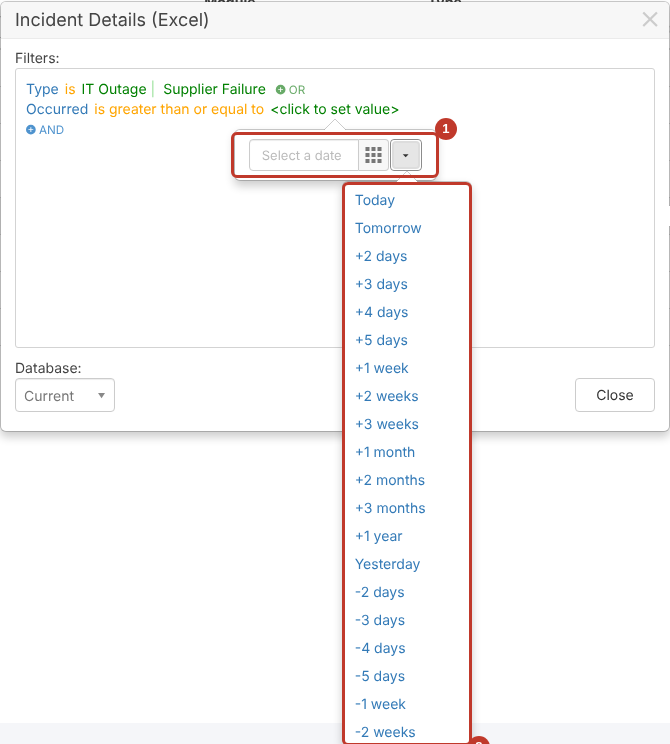
- Click <click to set value>. Either pick a date with the calendar, or click the small arrow (1) to choose a date relative to today (2), such as Today, Yesterday or -1 week.
Tip: Relative dates move with the calendar, so a saved filter using -1 week always reports on the last 7 days.
Combining Filters #
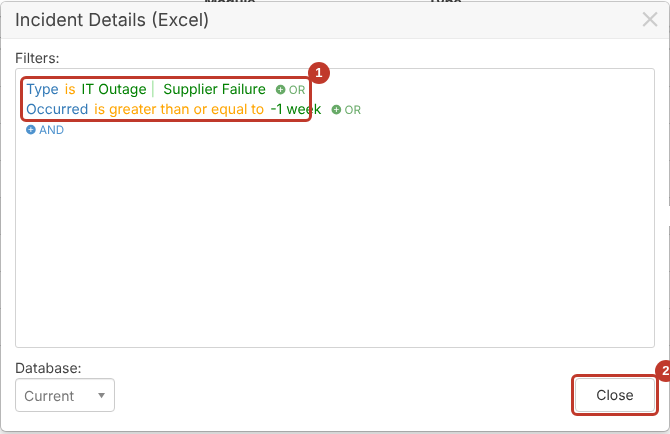
Every line you add with + AND must match. This filter (1) includes IT outages and supplier failures that occurred in the last week. Click Close (2) when you’ve finished.
The ticked box next to Filter (1) shows that the report has a filter applied.
Generating the Filtered Report #
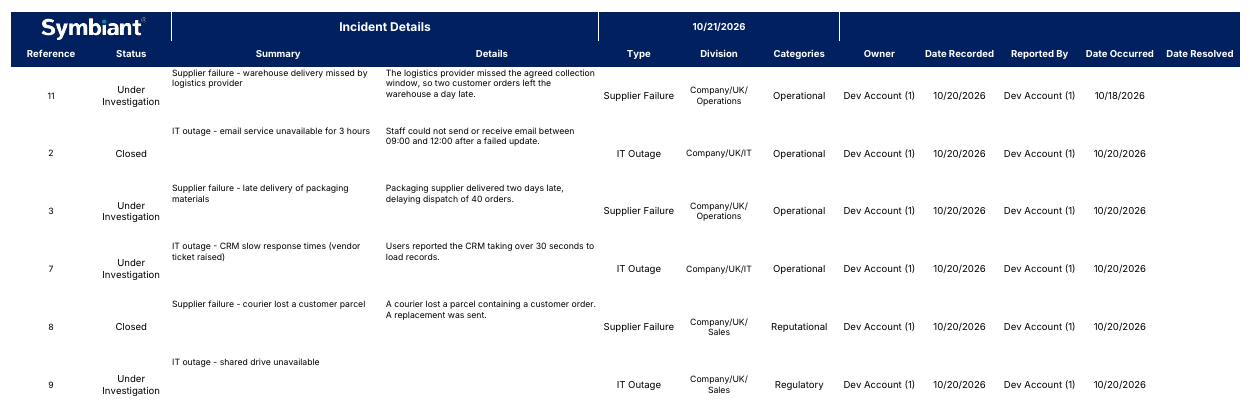
Click Generate. The report only includes the matching records:
Reporting on an Earlier Point in Time #
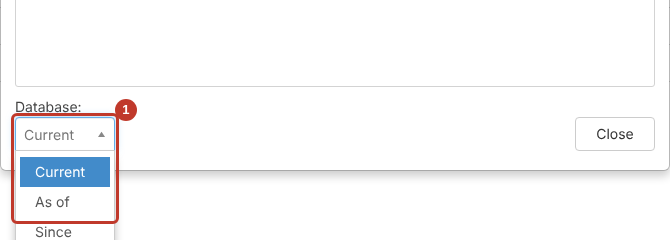
The Database option in the filter panel (1) controls which data the report is run against:
- Current: today’s data (the default).
- As of and Since: run the report against the history of your data from a date and time you choose, rather than today’s data.
See Database History & Restoring Historical Records for more about history.
Saving and Loading Filter Presets #
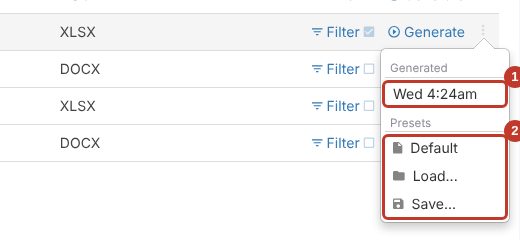
Click the three dots (⋮) at the end of the report’s row to see:
- Generated (1): when you last generated the report.
- Presets (2): Save… stores the current filter under a name, Load… applies a saved filter, and Default returns the report to its default filter (removing the filter you added).