
 Doc Summary

This article shows you how to add, remove, move and rename the columns of a grid on a module’s dashboard (List view), and how to use the node editor to make columns sortable or filterable and to add rule columns such as a target score.
Applies to: System administrators (
adminrole) · Module: any module view (the example uses Register Risks)
Loading Your View #
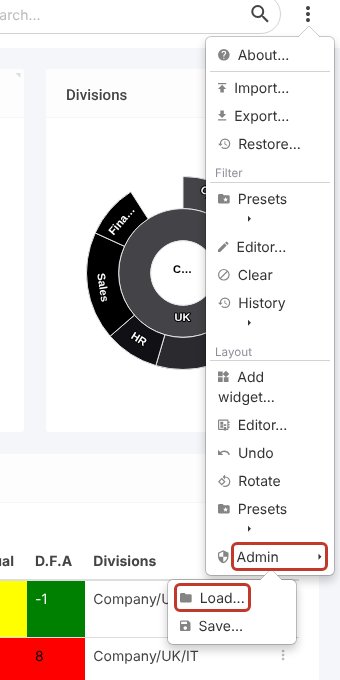
- On the dashboard, click the ⋮ at the top right of the screen, then Admin > Load….
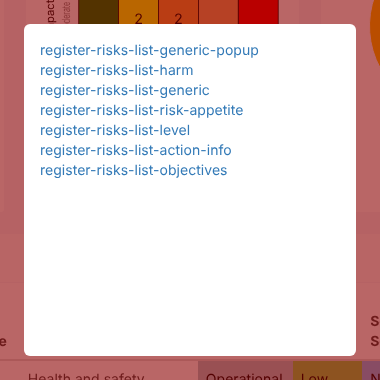
- Click your company-specific view. If you only see
-genericviews, follow Creating Your Own Custom Views first.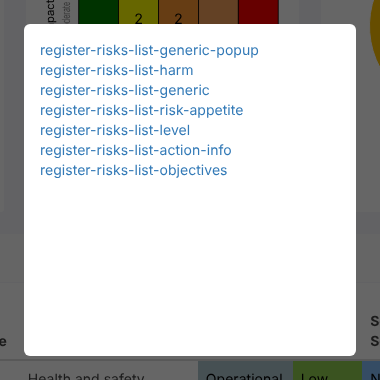
Opening the Grid Editor #
- Click the ⋮ at the top right of the grid, then Set up….
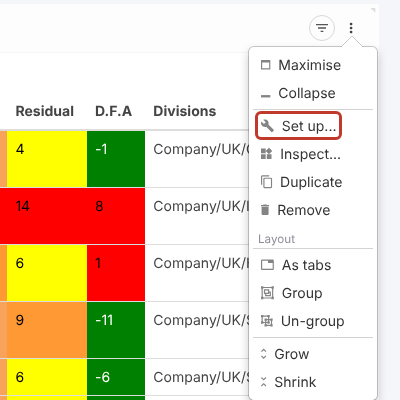
- Each column of the grid is now shown as a card, with tools at the top right of the grid.
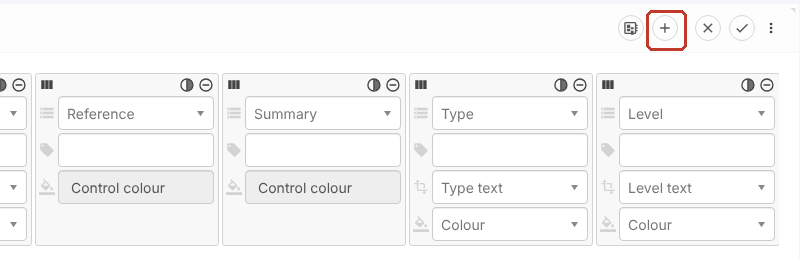
Each card has four boxes, from top to bottom:
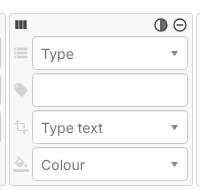
- Column item: the field shown in the column, for example Type.
- Label: the column heading. Leave it blank to use the field’s own name.
- Data: which part of the field to display. For drop-down fields choose the text value (for example Type text).
- Colour: which colour to shade the cell with, usually Colour.
Adding a Column #
- Click the + (Add Column) at the top right of the grid. A blank card is added at the end of the columns.
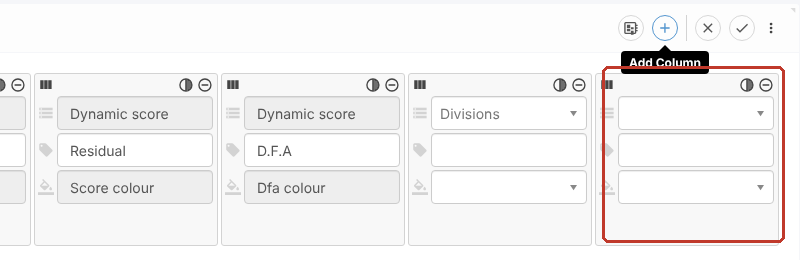
- In the top box choose the field to show. Fill in the other boxes as above. At least the column item must be set.
- Click the ✓ at the top right of the grid to finish.
Removing a Column #
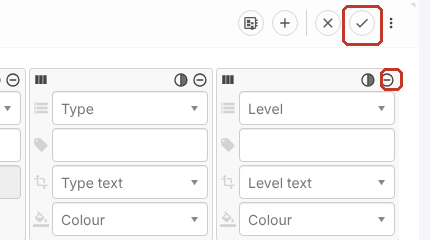
- Click the ⊖ at the top right of the column’s card.
- Click the ✓ at the top right of the grid.
Moving a Column #
Drag a card by the handle at its top left (|||) and drop it in its new place, then click the ✓.
Renaming a Column #
Type the new heading in the card’s Label box (the second box), then click the ✓.
Tip: The ✕ next to the ✓ throws away your column changes.
Using the Node Editor #
The cards only show the basic settings. The node editor shows every setting of the grid and its columns. Use it to let users sort or filter by a column, or to show a value worked out by a rule, such as a risk’s target score.
- With the grid in set-up mode, click the Show node editor icon at the top right of the grid, to the left of the +.
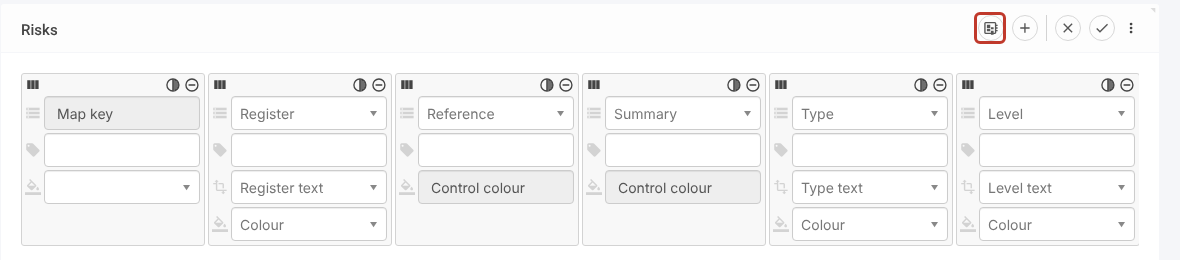
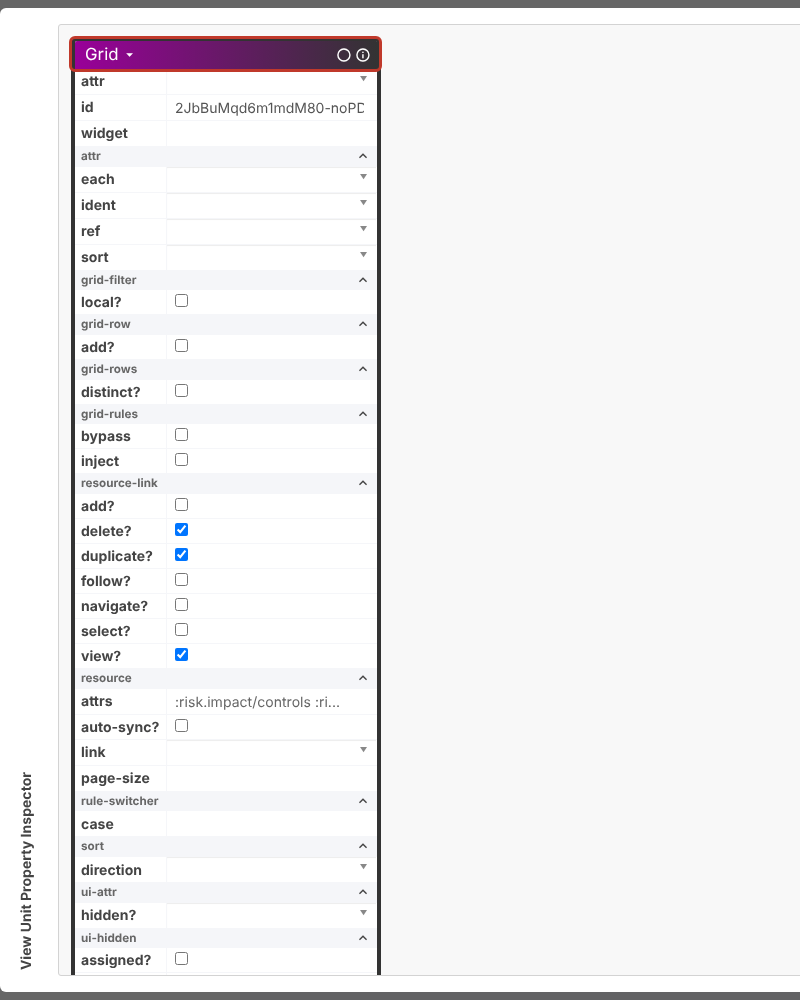
- The node editor opens. The first box, Grid, holds the settings for the whole grid. Below it there is one box for each column, in the same order as the cards. Scroll down to find a column.
Letting Users Sort and Filter by a Column #
Scroll to the ui section at the bottom of the column’s box:
- caption is the column heading.
- filterable? adds a filter box under the heading, so users can filter the grid by this column.
- sortable? lets users click the heading to sort the grid by this column.
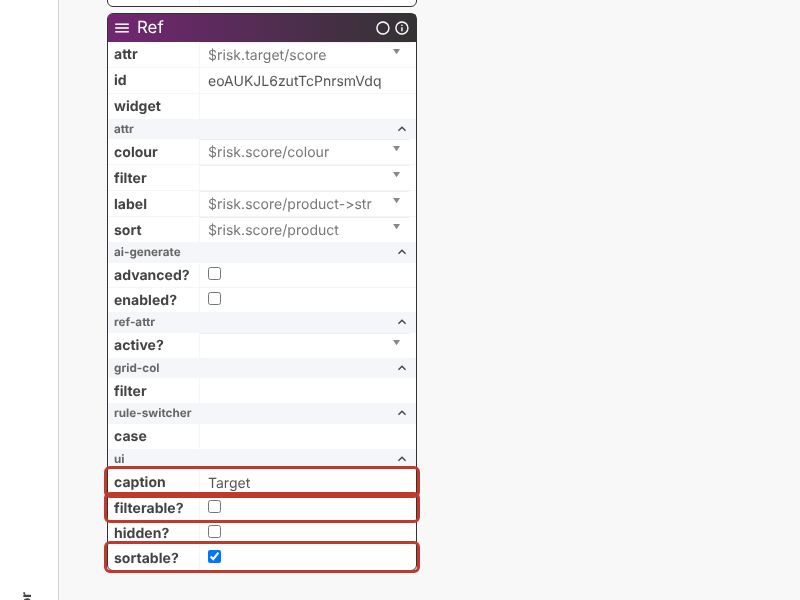
A new column has both boxes unticked, so tick the ones you need.
Adding a Rule Column (Example: Target Score) #
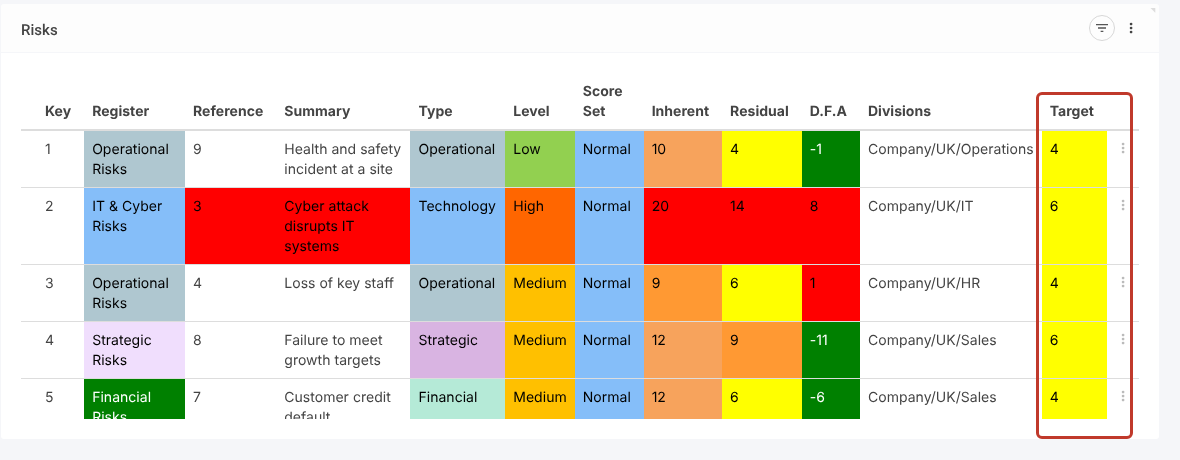
Some values aren’t stored on the record but worked out by a rule. Rules start with $, for example $risk.inherent/score (the Inherent column), $risk.dynamic/score (the Residual column) and $risk.target/score (the target score). The cards can’t pick a rule, so you set it in the node editor. The example adds a Target column to the Risks grid.
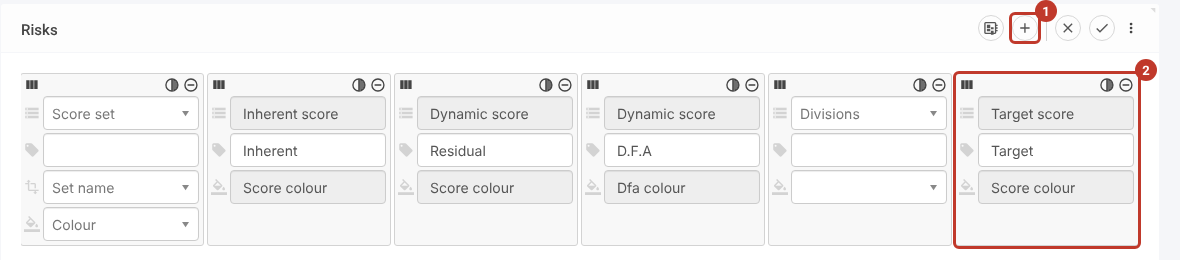
- Click the + (1) to add a column and choose the nearest field in the card’s top box, here Target score. Type Target in the label box. Once the rule is set, the card (2) shows its boxes greyed out.
- Click the Show node editor icon and scroll to the bottom. The new column is the last box.
- Click attr, type target and choose $risk.target/score.
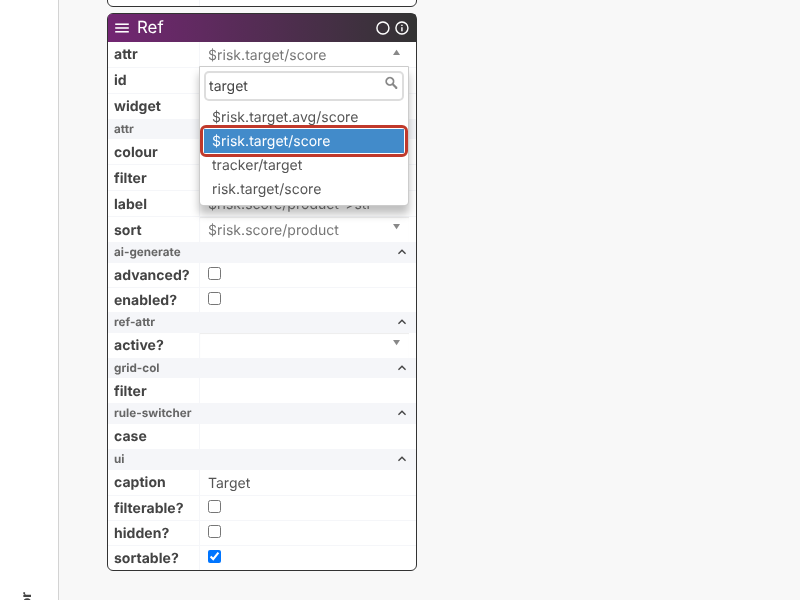
- Fill in colour, label and sort the same way as a similar rule column. For a score, copy the Inherent column: colour $risk.score/colour, label $risk.score/product->str, sort $risk.score/product.
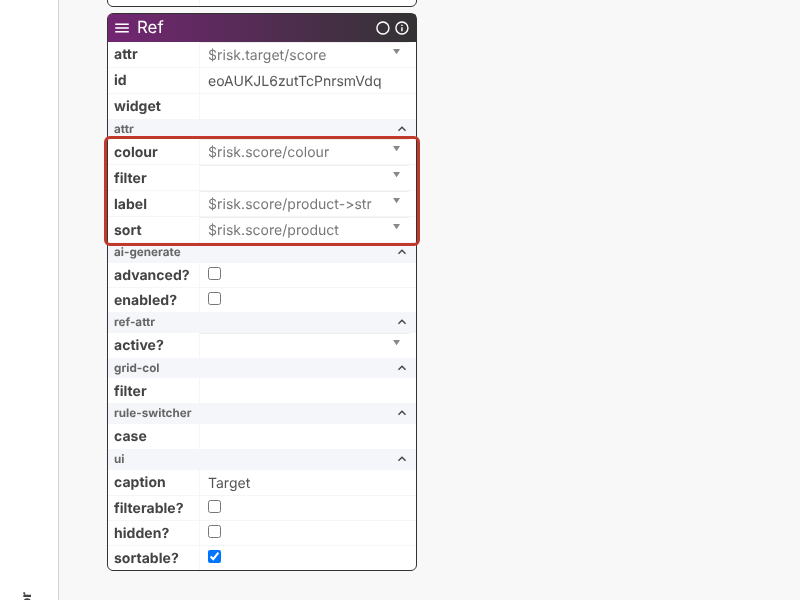
- Under ui, type a caption (for example Target) and tick sortable? and filterable? if you need them.
- Scroll back to the Grid box at the top. Under resource, click attrs (1) and tick each field the rule needs (2), here :risk.target/score.
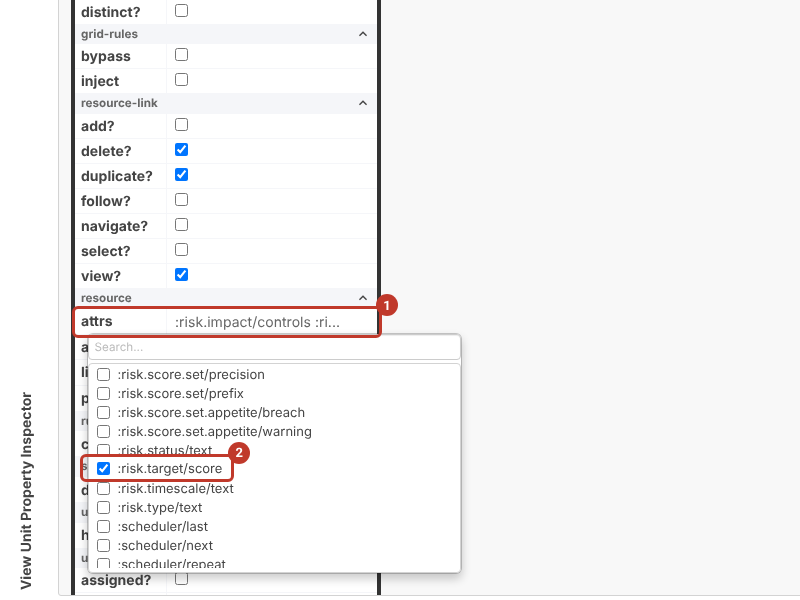
Critical: When a column brings in a rule, add the fields the rule uses to the parent Grid’s attrs list. If you don’t, the column stays blank. The Risks grid is a good example: its attrs list already holds :risk.inherent/score, :risk.residual/score, :risk.impact/controls, :risk.likelihood/controls, :risk.score/set and :risk.score/appetite for its Inherent, Residual and D.F.A columns.
- Click the ✓ at the bottom right of the node editor, then the ✓ at the top right of the grid.
- Save the view as below, then sign out and back in. A rule column only shows its values once the saved view is loaded again.
Saving the Layout for Everyone #
- Click the ⋮ at the top right of the screen, then Admin > Save….
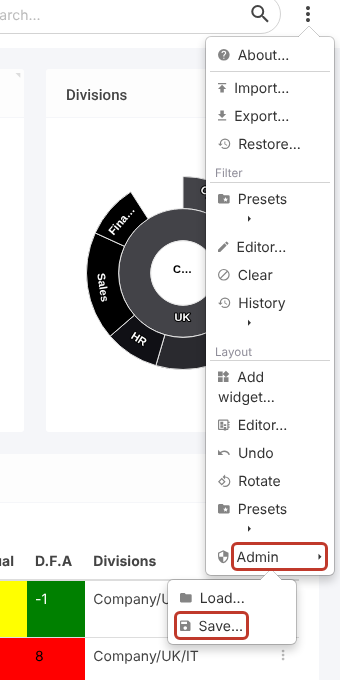
- Click the view you loaded at the start.
- Sign out and back in so the change shows.
Critical: Don’t save over the generic views.
Saving the Layout Just for Yourself #
You can keep a layout as a personal preset instead, so only you see it. This works for any view.
- Click the ⋮ at the top right of the screen, then Presets (under Layout) > Save….
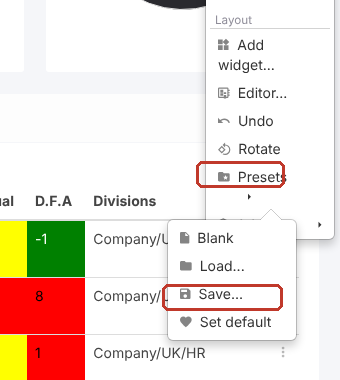
- Enter a Name and click Save.
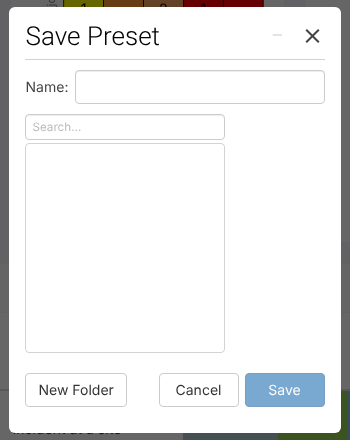
- To use it later, choose Presets > Load… and pick your preset. Set default makes the current preset load automatically for you.