
 Doc Summary

You can add many records to a module at once by importing a CSV file. This article uses the Incidents module as an example, but the steps are the same for any module.
Note: Applies to: users whose role includes Import… in the module’s ⋮ menu (usually admins and module managers).
Before You Start #
Check your file follows the rules in Preparing Data for Import (Default). Most import problems come from the file, not the import itself.
Choosing the File #
- Open the module (for example Incidents).
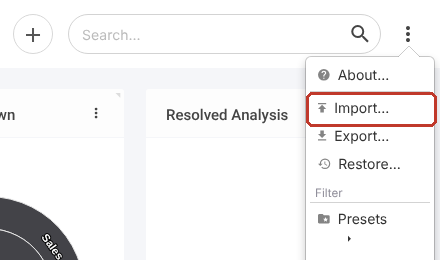
- Click the three dots (⋮) at the top right, then Import….
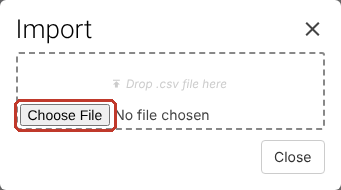
- Click Choose File and pick your CSV file, or drag the file onto the box.
Matching Columns to Fields #
The Configure CSV Import screen shows each column from your file, numbered and with its heading, and a drop-down under each one.

Tip: Click the translate button (the one next to the star) to show the field names as your users see them. Without it, the drop-downs show the system names (for example generic/summary).
- Click the drop-down under each column and choose the field it belongs to. You can type to search the list.
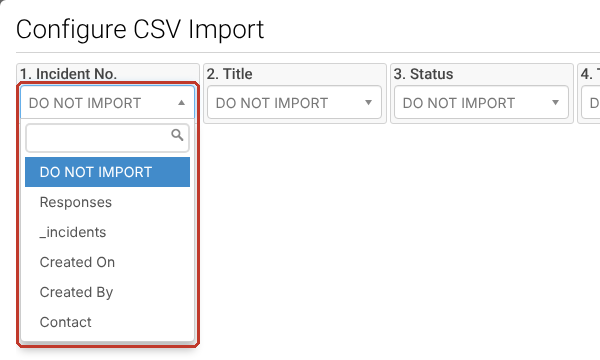
- Leave a column as DO NOT IMPORT to skip it.
- You must import the two system-required fields, Reference and Summary. Also import any other required fields (marked with a red asterisk on the form).
Drop-Down Fields #
When you choose a drop-down field (for example Status), a second drop-down appears underneath. Choose the field’s name again (here Status) to import the value as text.
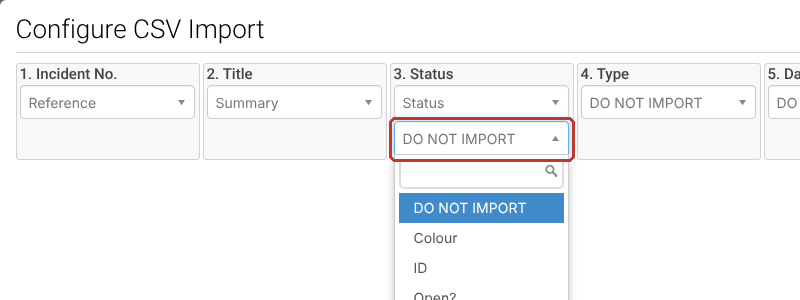
Important: If you leave the second drop-down empty, Symbiant tries to import the value as an ID and the import will fail. If a text value doesn’t exist yet as an option, it is created during the import.
When every column is matched, the screen looks like this:

Saving the Layout as a Preset #
If you will import the same kind of file again, save the column choices as a preset so you don’t have to pick them each time.
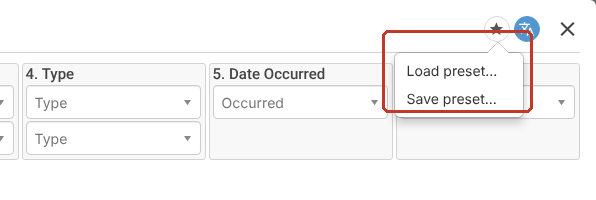
- Click the star at the top right of the import screen, then Save preset….
- Enter a name and click Save.
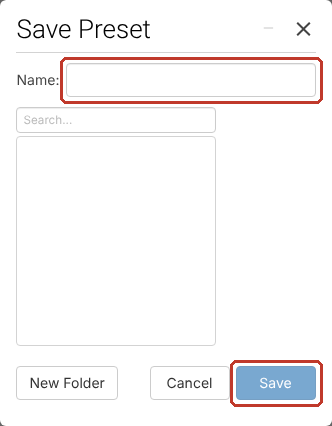
Next time, click the star and choose Load preset… to apply the saved choices.
Checking and Importing #
- Click Continue.

- The Review CSV Import screen shows the data as it will be imported. Check the values are in the right fields.
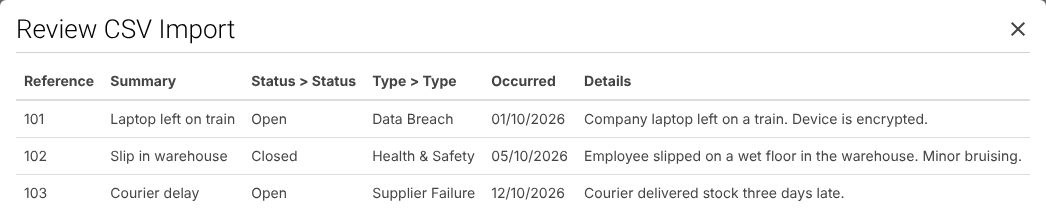
- If something is wrong, click < Back to change the column choices. When you’re happy, click Import.

A CSV successfully imported. message confirms the records have been added to the module.

Tip: Include a Divisions column. You only see records in divisions you have access to, so records imported without a division may not appear on the dashboard.
Critical: References must be unique. If an imported reference already exists, the existing record is overwritten with the imported version.