 Doc Summary

This article shows you how to change fields on a view: their caption, help text, whether they are required or hidden, and where they sit.
Applies to: System administrators (
adminrole) · Module: any module view (the example uses Register Risks)
Before You Start: Check You Have Your Own View #
Every module ships with generic views (their names end in -generic). Make your changes to a company-specific copy, so a later update to the generic view doesn’t overwrite your work.
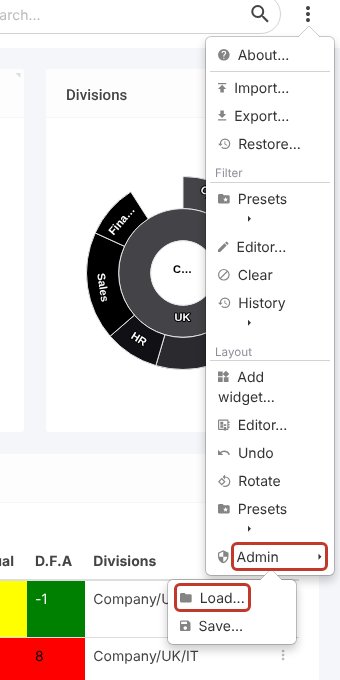
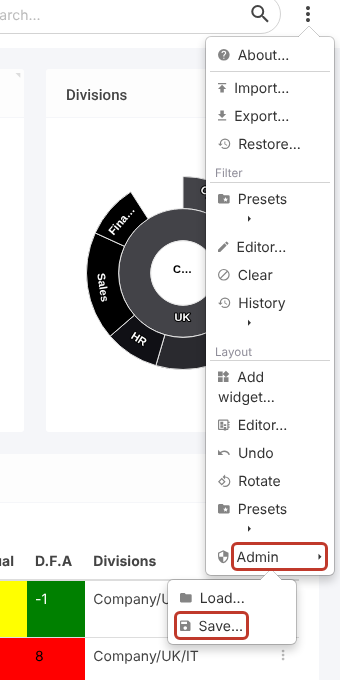
- Open the view you want to change, click the ⋮ at the top right of the screen, then Admin > Load….
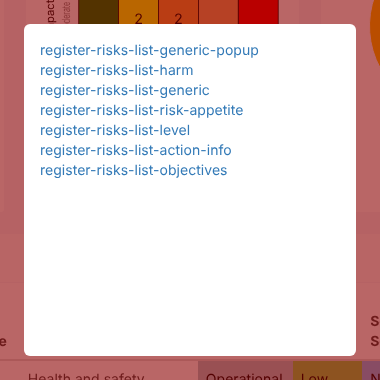
- The list shows the views saved for this screen. If you only see
-genericnames, follow Creating Your Own Custom Views first. If your company view is listed, click it to load it.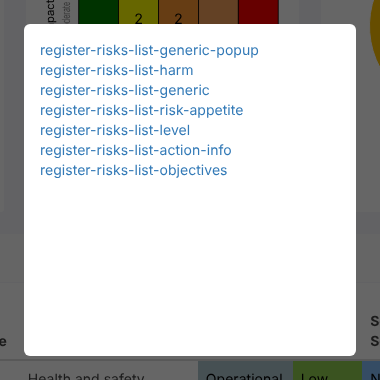
Critical: Don’t save over the generic views.
Opening the Field’s Settings #
- On the view, click the ⋮ at the top right of the form (not the one at the very top right of the screen), then click Set up….
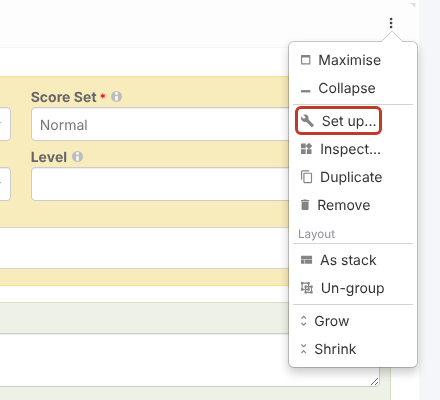
- The form is now in set-up mode. Every field gets its own ⋮ on the right and a move handle ✥ on the left. Any hidden fields are shown too.
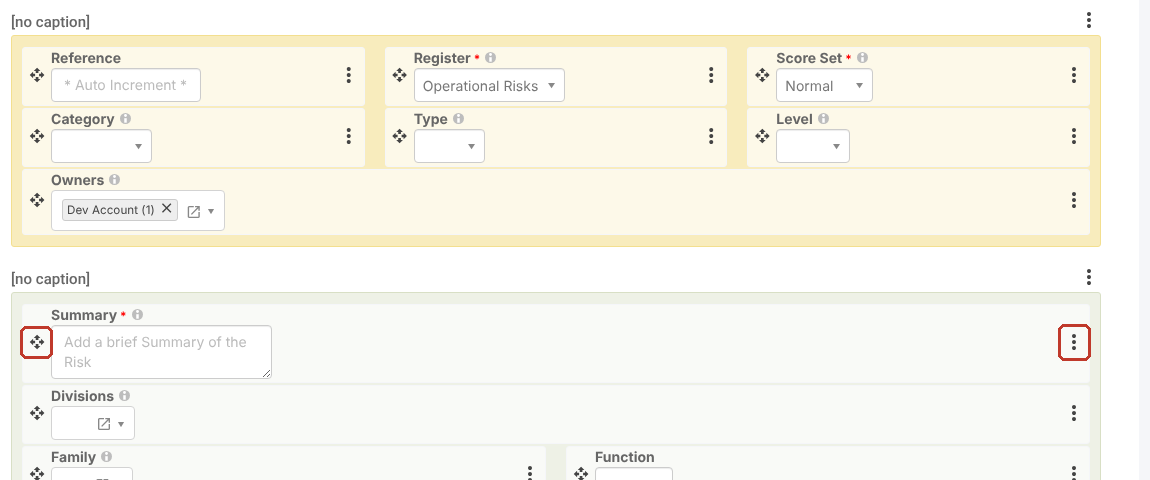
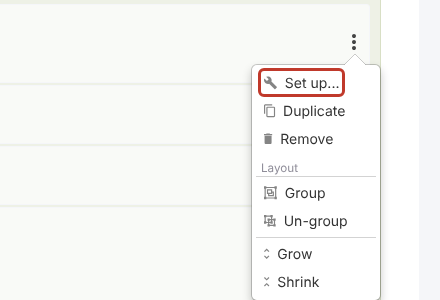
- Click the ⋮ of the field you want to change, then click Set up….
- The field’s settings open in a panel. Scroll inside the panel to see all of the sections.
The Settings You’ll Use Most #
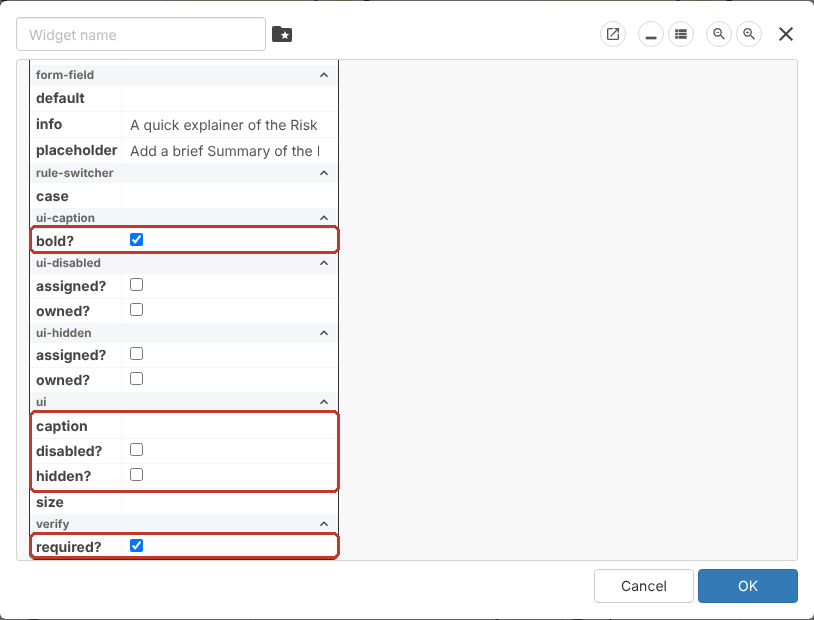
- info (form-field): help text users see when they click the ⓘ next to the caption.
- placeholder (form-field): grey hint text inside an empty box.
- bold? (ui-caption): shows the caption in bold.
- caption (ui): the label shown to users. Leave it blank to use the standard label.
- disabled? (ui): users can see the field but can’t change it.
- hidden? (ui): hides the field.
- required? (verify): the record can’t be saved until the field is filled in.
Moving Fields #
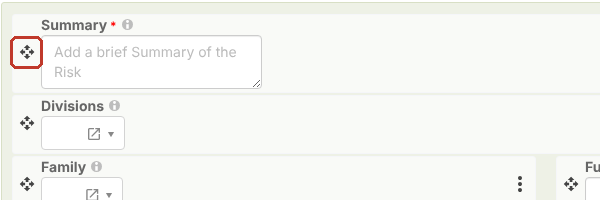
While the form is in set-up mode, drag a field by its ✥ handle on the left and drop it where you want it. The field’s ⋮ menu also has Grow and Shrink to change its width, and Group to put fields side by side.
Adding a Field to a Form #
You can put a field on a form that isn’t shown yet by copying a field of the same kind and pointing the copy at the new field. This needs the field selector (shown as attr in the settings panel), which is switched off by default; ask Symbiant Support to turn it on for your administrator account. The example adds a second text box, captioned Lessons Learned, to the New Incident form.
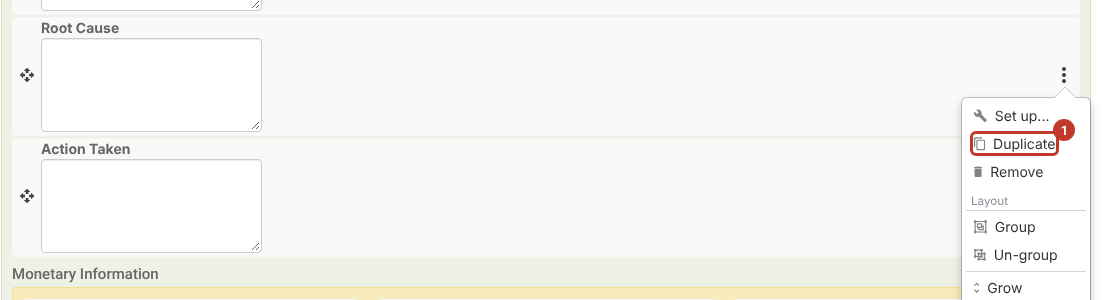
- With the form in set-up mode, click the ⋮ of a field of the same kind as the one you want to add (for example Root Cause, a text box), then Duplicate (1).
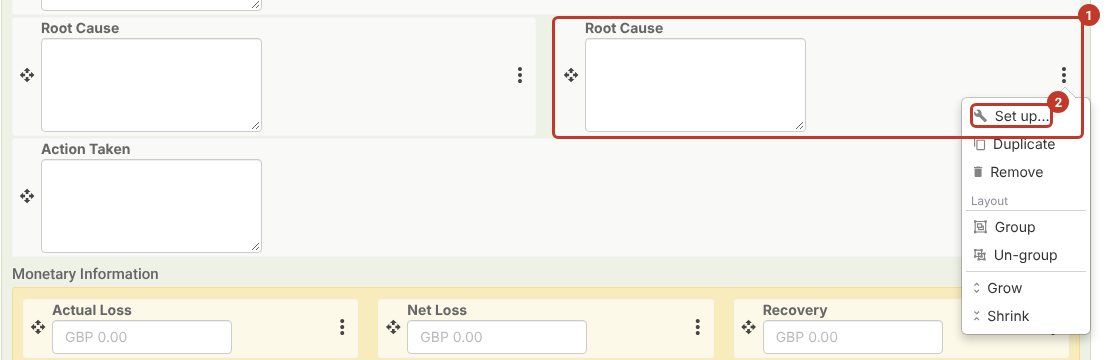
- The copy (1) appears next to the original. Click its ⋮, then Set up… (2).
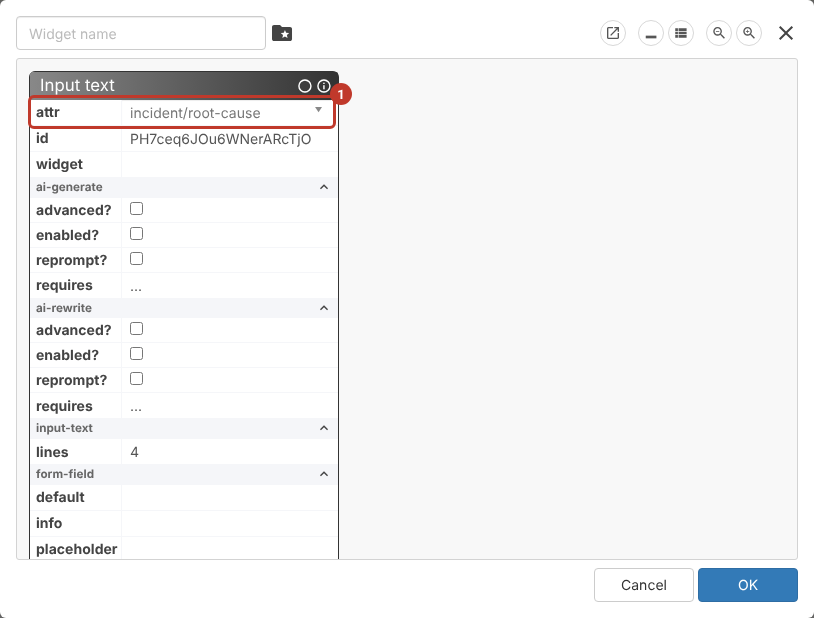
- At the top of the settings panel, attr (1) shows the field the box saves to, here incident/root-cause. Click it.
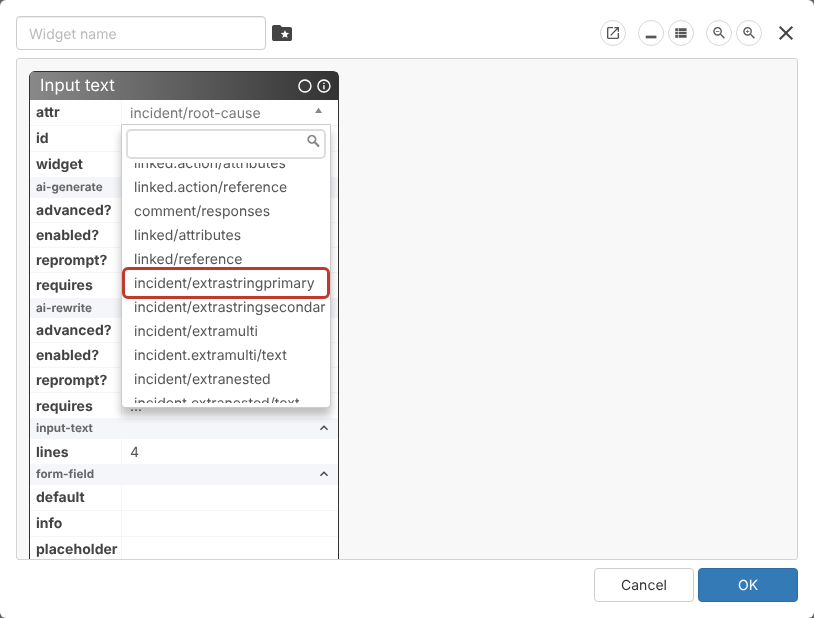
- Pick the field you want, for example incident/extrastringprimary. Fields are listed by their system names; type part of the name in the search box to find one.
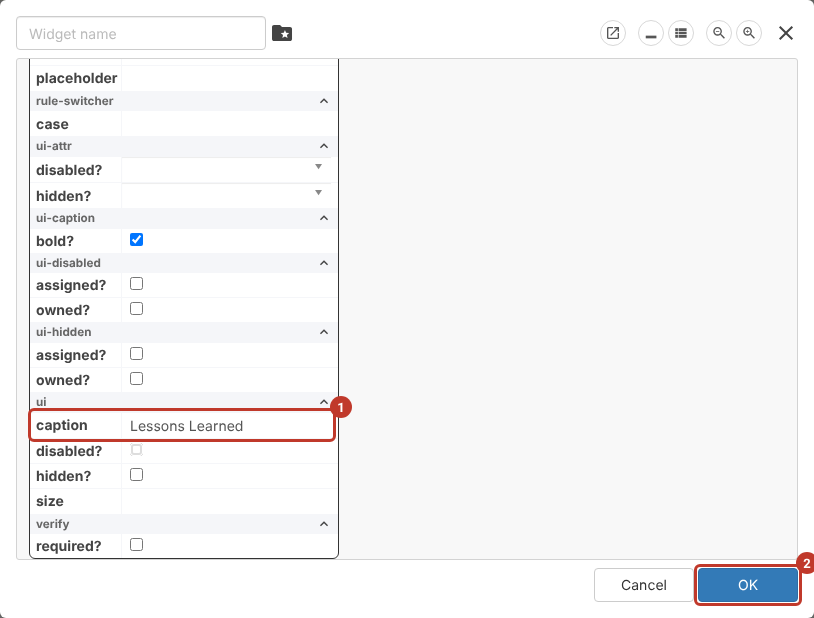
- Scroll down to ui and type the label users should see in caption (1), for example Lessons Learned. Set required?, info or placeholder if you need them.
- Click OK (2).
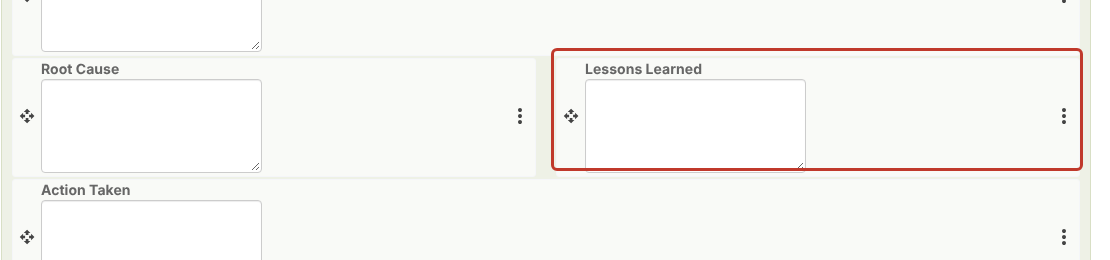
The new field shows on the form with its caption. Move it into place with its ✥ handle, then save the view as below.
Critical: Only pick a field that isn’t already on the form and is the right kind for the box: text fields for text boxes, drop-down fields (with their /text label) for drop-downs. Fields named extra… are spare fields on some modules; check with Symbiant Support before using one, as it may already be used elsewhere on your site. Add the field to the Details view too, so users can see and edit it after the record is saved.
Saving the View #
Critical: Don’t click the blue Save button at the top of the screen. On a New or Details view that saves the record, not the layout.
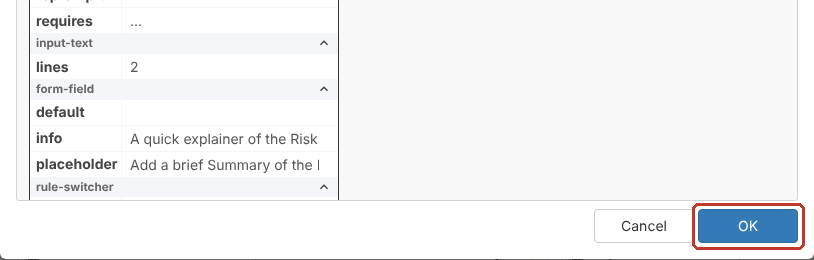
- Click OK at the bottom right of the settings panel to keep your changes (or Cancel to drop them).
- Click the ✓ at the top right of the form to leave set-up mode and keep the layout changes. The ✕ next to it throws them away.
- Click the ⋮ at the top right of the screen, then Admin > Save….
- Click your company-specific in the list. If you loaded it before making changes, it is the one to pick. The red background is a reminder that this overwrites the saved view for everyone it is assigned to.
- Sign out and sign back in so your browser picks up the new view.