
 Doc Summary

Symbiant has a REST API so your own systems can read and write Symbiant data. This article explains how to get access, authenticate and make requests. The examples use the Incidents module, but every module works the same way.
Note: Before you can use the API, Symbiant must allow your server’s IP address to connect. Raise a support ticket to arrange this.
What You Need #
- A Symbiant user account with an API-enabled role. If you don’t have one, raise a support ticket.
- An EDN (Extensible Data Notation) parser for your language, for example edn-java, jsedn, edn-ruby or edn_format for Python.
- A Transit encoder and decoder, for example transit-java, transit-js, transit-ruby or transit-python.
Warning: These libraries are written by third parties. Symbiant can’t guarantee them, and you use them at your own risk.
How Access Works #
Every API request is made as a specific user with an API-enabled role. The API applies the same permissions as the Symbiant app: the user can only read and change what they could in the app, including only records in their divisions. Make sure the user has the roles and divisions the job needs.
Getting an API Token #
- Sign in to Symbiant as the API-enabled user.
- Click the three dots (⋮) at the top right, then API token. If you don’t see it, the user doesn’t have an API-enabled role.
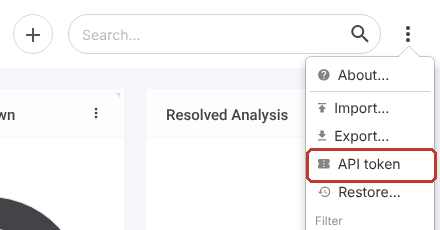
- A text file downloads. It contains everything you need:
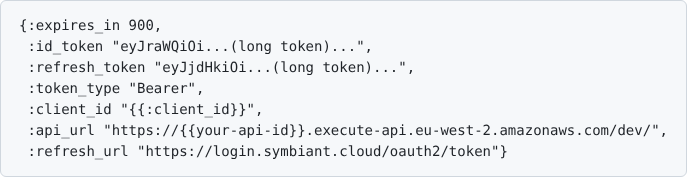
| Item | What it’s for |
|---|---|
:id_token | The token you send with every request |
:expires_in | How many seconds the token lasts (for example 900, which is 15 minutes) |
:refresh_token | Used to get a new :id_token without signing in again |
:api_url | The address to send requests to. In the examples below it is written {{:api_url}} |
:client_id, :refresh_url | Used when refreshing the token |
Critical: Keep the token file secret. Anyone with it can act as that user until it expires.
Making Requests #
The API follows the usual REST pattern. The address starts with /read/ for reading and /write/ for changes:
| Action | Method | Address |
|---|---|---|
| Read records | GET | {{:api_url}}/read/modules/{module} |
| Read one record | GET | {{:api_url}}/read/modules/{module}/{reference} |
| Create a record | POST | {{:api_url}}/write/modules/{module} |
| Update a record | PATCH | {{:api_url}}/write/modules/{module}/{reference} |
| Delete a record | DELETE | {{:api_url}}/write/modules/{module}/{reference} |
Tip: :api_url already ends with a slash, so don’t add a second one.
Every request needs these headers:
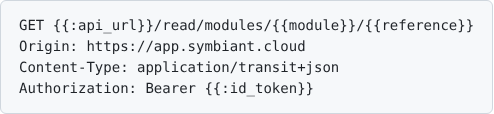
Request and response bodies are EDN, encoded with Transit (JSON). Attribute names are namespaced keywords, for example :incident/reference (written "~:incident/reference" in Transit).
Reading a Record (GET) #
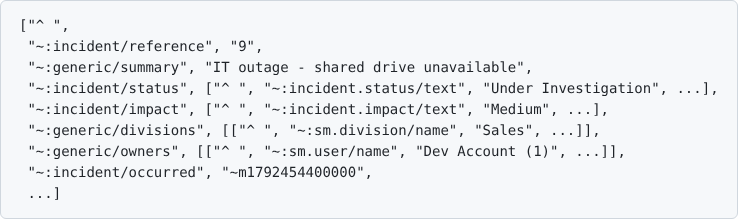
This reads incident 9:
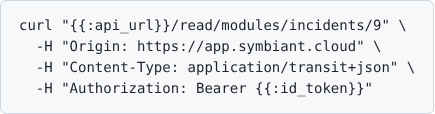
The response holds the record’s attributes and values. Drop-down and linked values come back with their text and IDs:
GET Filters #
Add filters to the address to narrow the results:
| Filter | Meaning | Value |
|---|---|---|
p | pull | A comma-separated list of the attributes to return |
e | equal to | Attribute and value separated by a comma; use a semi-colon to go into nested attributes |
n | not equal to | As above |
l | less than | As above |
g | greater than | As above |
le | less than or equal to | As above |
ge | greater than or equal to | As above |
c | contains | As above. Text values only, URL encoded, and case sensitive |
x | exists | Must have the listed attributes |
m | missing | Must not have the listed attributes |
For example, ?p=incident/reference,generic/summary returns only the reference and summary of every incident:

Finding Resources and Attributes (help) #
Put /help in front of any address to see its structure instead of its data:
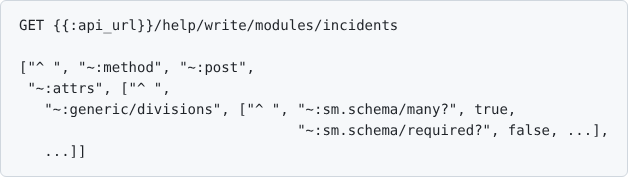
{{:api_url}}/helplists every resource and attribute.{{:api_url}}/help/read/modules/{module}/{reference}shows what a GET returns.{{:api_url}}/help/write/modules/{module}shows what a POST needs. Add a reference to see what a PATCH accepts.
The results show each attribute, whether it’s required, whether it holds a list, and which is the primary key.
Module names match the app. When you open a module, the address bar shows its name, for example app.symbiant.cloud/modules/incidents or /modules/register-risks. Use the same name in the API.
Creating a Record (POST) #
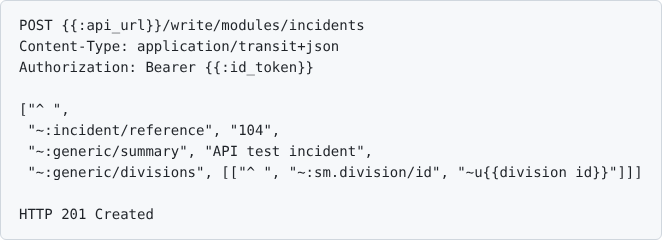
The primary key (for example :incident/reference) is always required, along with any attributes the help output marks as required (for example :generic/summary). Linked values such as divisions are given by ID.
Updating a Record (PATCH) #
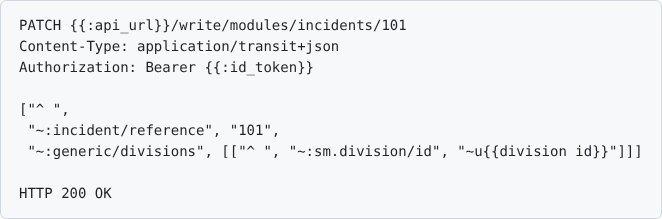
Always include the primary key, then only the attributes you’re changing. Don’t send unchanged attributes, because they would add noise to the audit trail. This example adds a division to incident 101:
Removing Values #
To remove a value, put it under :tx/retract in a PATCH:

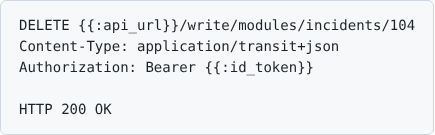
Deleting a Record (DELETE) #
Critical: A DELETE request removes the record straight away.
Refreshing the Token #
Before the :id_token expires, use the refresh token to get a new one. Send a POST to the :refresh_url from your token file:

The response contains a new id_token and refresh_token. It doesn’t include the URLs or client ID, so keep using those from the original token file.
Testing the Connection with Postman #
You can check you can connect with a tool such as Postman. Postman can’t decode Transit, so use it only to test the connection. (The Postman screenshots are from an earlier version of this article.)
- Create a GET request.
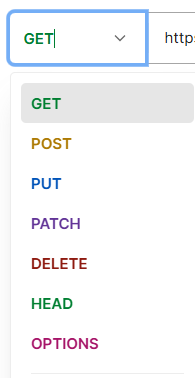
- Open Headers, then add Origin (your Symbiant app address, for example
https://app.symbiant.cloud) and Content-Type (application/transit+json).


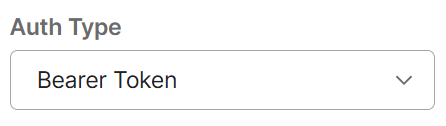
- Open Authorization, set Auth Type to Bearer Token, and paste in only the
:id_tokenvalue (not the whole file, and not the refresh token).
- Enter an address, for example
{{:api_url}}/read/modules/incidents/1, and click Send. A 200 OK status with data in the body means the connection works.