How to modify a User field to Limit or Allow specific users.
Accessing a View #
When on the view you wish to edit, select the three dots on the right side, and then Set Up,
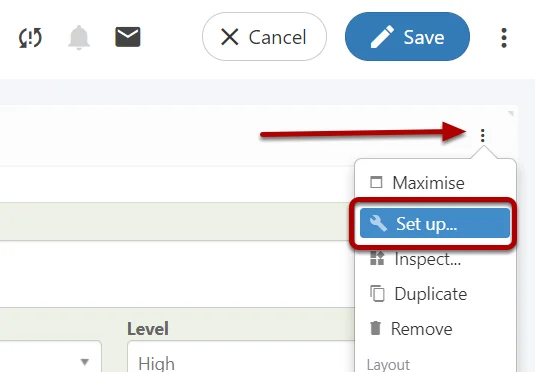
This will add the three dots to every element on the view, from here find the User Field you wish to edit,

Limiting By Role #
Within the node, enter the roles you want to appear,
User a pipe | to separate each role. E.g. risk_admin|risk_div_admin
(Note: Ensure the Role name is Exact)
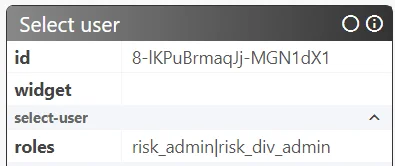
Select Ok, once finished,
(Only users with that role will now appear)
Limiting Number of Users #
Within the node, enter a maximum number of users that can be assigned to this user field. (E.g. 1, 2, 10)
(Note: Leave blank to be Unlimited)

Select Ok, once finished,

You can now only select up to the maximum entered.
Selecting Author of Record #
Within the node, select-auth? automatically sets the Owner of a record to the user creating it,
This can be useful when you want the Owner to automatically always be the creator or part of the ownership alongside others.

Limiting By Division & Policies #
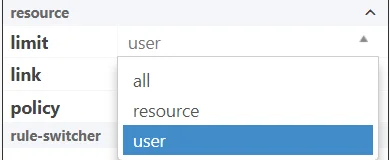
Within the node, select Limit, you can either Limit by User, Resource or All.
Limiting By User #
This will hard lock limit the user field to the current user’s division (Regardless of Role Policies).
Example: The current user is in Symbiant/UK, with this limit applied they can only see other users who are also in Symbiant/UK
They cannot see users who are in a Higher division, (in this example Symbiant) but can see users in the division Below, such as Symbiant/UK/Sales.

Limiting By Resource #
This will limit the user field to the current user role policies,
Example: risk_admin hasn’t got any set policies and therefore would allow you to see all users,
while risk_div_admin is divisionally bound, with the Resource limit applied they can only see other users who are also in their division.

Limiting By All #
This will allow ALL users to be displayed disregarding Division and Role Policies,
This will then simply list all Users in the System (Unless another Limit is in place)

Select Ok, once finished,

Limiting By Policy #
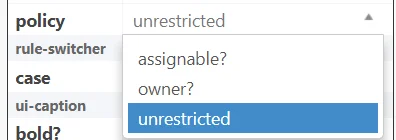
Within the node, select Policy, you can either Limit by owner?, assignable? or unrestricted.
Limiting By Owner #
This will limit the user field to users who have an Owner Role.
Example: risk_record_owner, control_record_owner, audit_record_owner
(Note: Limits are additive so you can limit by Division and then Policy)

Limiting By Assignable #
This will limit the user field to users who have an Assignable Role.
Example: risk_action_assignee, control_action_assignee, audit_action_assignee
(Note: Limits are additive so you can limit by Division and then Policy)

Limiting By Unrestricted #
This will allow ALL users to be displayed disregarding policy (The most common),

Select OK, once finished,

Saving the View (Do not select the blue Save Icon) #
Once you completed your view changes, select the Tick at the top right,

Select the three dots again at the top right, and then select Admin, and Save,
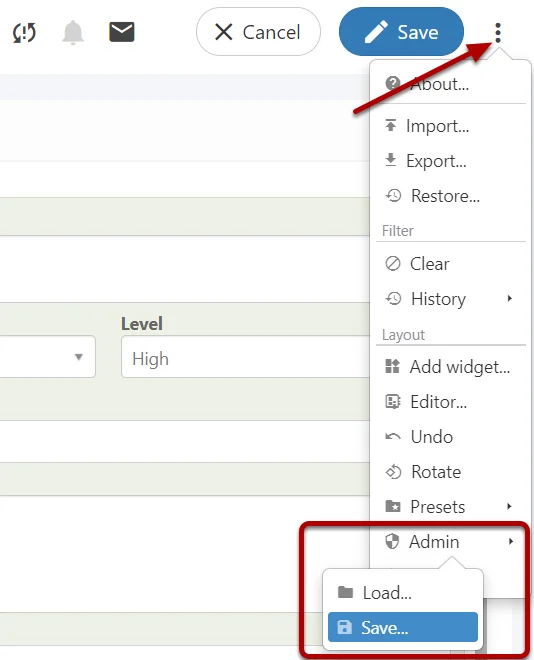
Select your company-specific view from the list,

It is highly recommended you don’t save over generic views!
To create Custom Views please follow these steps: Creating Your Own Custom Views
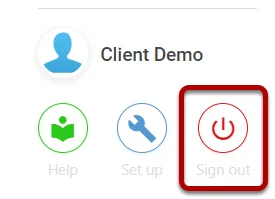
Once saved, Sign Out of Symbiant and log back in to ensure your view cache is cleared.
