Skip to content
Symbiant System Black Logo
  • Home
  • Knowledge Base
  • Symbiant Website
  • Symbiant Changelog
  • Submit a Ticket
  • My Support Tickets
  • Home
  • Knowledge Base
  • Symbiant Website
  • Symbiant Changelog
  • Submit a Ticket
  • My Support Tickets
Popular Keywords importuserdivisionsamladd

Admin Basics

  • Setup Mode/Admin Menu
  • Creating/Adding Users
  • Transferring Ownership from One User to Another (Assuming)
  • Making a User Active/Inactive
  • Delete a User
  • Changing a Record Reference
  • Managing Drop-Downs, Multi-Selects, and Multi-Levels
  • Resetting a User’s Password
  • Checking System Attachment Storage
  • Database History & Restoring Historical Records
  • Restoring a Deleted Record (Archived)
  • Audit Trails
  • Email Log Viewer
  • System Menu Layout & Options

System Translations

  • Adding a Translation Pack
  • Editing a Translation Pack
  • Mass Editing a Newly Created Translation Pack
  • Assigning a Translation Pack to a User
  • Exporting a Translation Pack
  • Importing a Translation Pack
  • Adding a Default Translation Pack
  • Creating a Locale Specific View (Translated View)
  • Editing a Locale Specific View (Translated View)

Importing Data

  • Preparing Data for Import (Default)
  • Imports with Hierarchical Data
  • Importing Data (Generic)
  • Preparing Data for Import (Risks)
  • Preparing Data for Import (Users)
  • Importing Users
  • Importing Divisions
  • Importing Errors & Issues

Automated Emails (Task Based)

  • Activating and Deactivating an Automated Email (Trigger) and (Scheduler)
  • Creating an Automated Email – When a record is Created (Trigger)
  • Creating an Automated Email – When a record is Updated (Trigger)
  • Creating an Automated Email – When a record is Deleted (Trigger)
  • How to Receive Module Specific Emails as System Admin (Trigger) and (Scheduler)
  • Editing an Automated Email – Sending to a Different Module Role (E.g. Risk Manager) (Trigger)
  • Editing an Automated Email – Sending to a Record User (Trigger)

Automated Email Reminders (Time Based)

  • Activating and Deactivating an Automated Email (Trigger) and (Scheduler)
  • Creating an Automated Email Reminder – When a Record is Due (Scheduler)
  • Creating an Automated Email Reminder – When a Record is Overdue (Scheduler)
  • Setting up Recurring Schedules
  • How to Receive Module Specific Emails as System Admin (Trigger) and (Scheduler)
  • Editing an Automated Email Reminder – Sending to a Different Module Role (E.g. Risk Manager) (Scheduler)
  • Editing an Automated Email Reminder – Sending to a Record User (Scheduler)

System Views

  • System Views (Quick Explainer)
  • Creating Your Own Custom Views
  • View Editor Tool Overview
  • Editing a View
  • How to Hide/Unhide Fields
  • Loading/Saving a Particular Users View
  • What are Widgets?
  • Adding a Grid Column
  • Adding Help Tips & Placeholder text
  • Modifying a User Field to Limit or Allow Specific Users
  • Modifying a Currency Field to Set Default

Exporting Data

  • Exporting Dashboard Data
  • Exporting Divisions
  • Exporting Users
  • Generating the System User Details Report

System Errors & Issues

  • Resolving System Issues
  • System Error Messages
  • Login Issues

Reporting Suite Tutorial

  • Creating a Word Report (Basic Data Output)
  • Creating an Excel Report (Basic Data Output)
  • Creating a PowerPoint Report (Basic Data Output)
  • Creating an Excel Tabular Report (Perfect for CSV)
  • Creating an Excel Audit Report (Audit Log Of Changes)
  • Adding a new column to an Excel Report
  • Removing a column in an Excel Report
  • Creating an Advanced Word Report (Adding Functions)
  • Advanced Report Coding (Using Owners, Divisions & Assignees in a Report)
  • Advanced Report Syntax
  • Advanced Filtering on Reports (Filtering Via Code)
  • Reporting Permissions

Advanced System Functionality

  • Multi-Factor Authentication (Google Authenticator)
  • Symbiant API

Document Management (System Setup)

  • Setting Up Document Types
  • Setting Up Document Statuses
  • Document Storage Limits and File Sizes
View Categories
  • Home
  • Knowledge Base
  • Admin Information
  • Admin Basics
  • Managing Drop-Downs, Multi-Selects, and Multi-Levels

Managing Drop-Downs, Multi-Selects, and Multi-Levels

1 min read

How to add, edit and delete drop-down, multi-select, and multi-level options

Accessing Drop-Down Options #

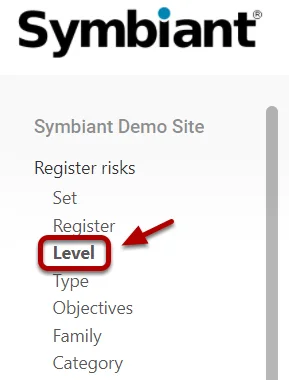
Navigate to the Stub (Sub menu item) you wish to manage. (In this example Risk Level)

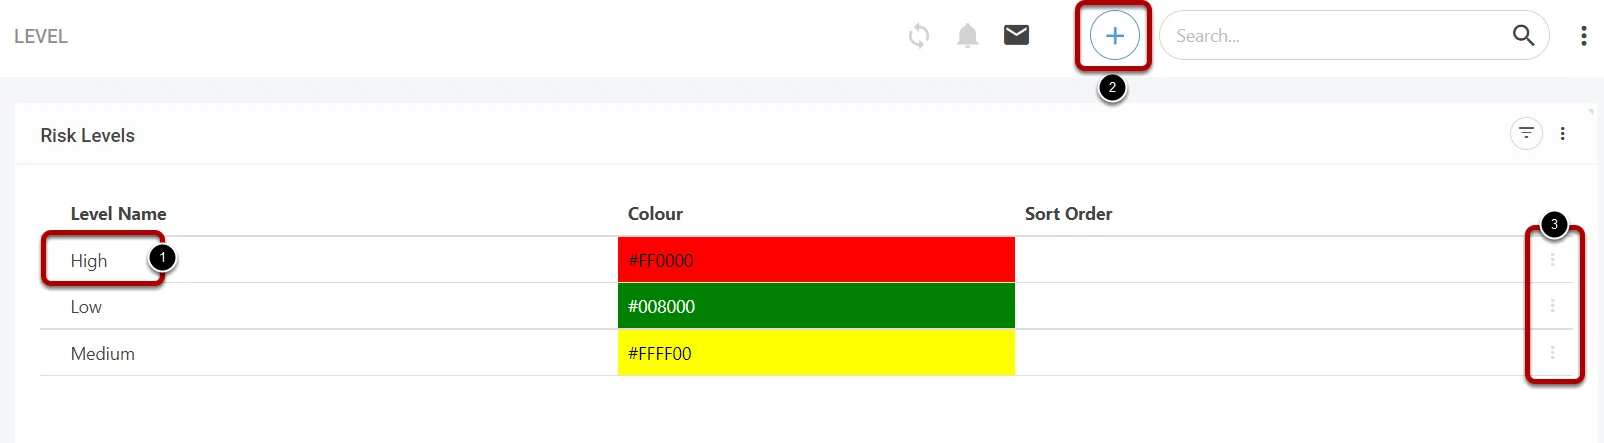
Within a Stub you can; Edit (1), Create (2) and Delete (3).

Editing an Option #

When selecting an option, you can then edit each field as you need. For example, editing the colour of this option. Remember to Save once finished.

Option Sort Order #

An option Sort Order (By Default) is the value this option shall appear on any dropdown/list within a form. (I.e. 1,2,3,4)

Adding a New Option #

Add a new Name, Colour and Sort order, then remember to Save.

Note: Adding a new option will make it accessible to any user who has permission to create/update a record in this particular module.

Deleting an Option (Archiving) #

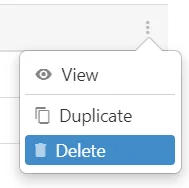
To delete an option, select the Three Dots on the right side, and select Delete, once confirmed this will delete the option from any records and the ability to add this option to new records.

Note: Options are never truly “Deleted” they are archived, and can be restored, please see: Deleting a Record (Archiving)


Multi-Level Drop-Downs #

Multi-level drop-downs are constructed differently to Single-select and Multi-select drop-downs.

This allows multiple levels of fields to be populated, similar to Divisions.

To edit Multi-level drop-downs, first enter a Multi-level drop-down using the Menu on the left.

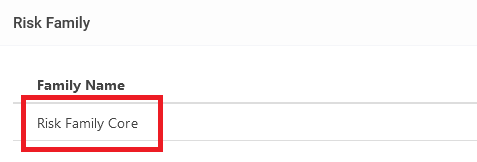
Once selected, you must then enter the drop-down itself by clicking on the Drop-down core (found in the red box).


This will then show the number of Levels currently within the Drop-down.

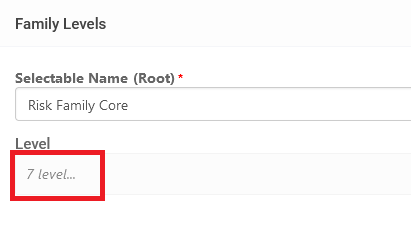
Click ‘x level…’ (found in the red box) to enter further into the drop-down’s options.

This will show all options on the top level. Each option can have further options.


To add a new option on this level, scroll to the bottom and click ‘Add Level’.

This will add a new option on this level, more options ( or levels) can be added underneath this new level.

Each Level has its own Sort Order meaning if a new Level is created, it starts from 1 again.


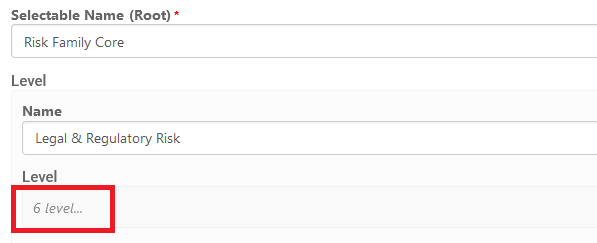
Further levels can be accessed by clicking ‘x level…’ (found in the red box).

Additional Levels (or options) can be added to each Level.

The ‘Add Level’ button will appear at the bottom of each Level, allowing Levels to be added wherever they are needed.


Add, Setup, Updating
Did this help?
Share This Article :
  • Facebook
  • X
  • LinkedIn
Require Additional Information? Please Contact Support

How can we help?

Updated on 3 July 2024
Changing a Record ReferenceResetting a User’s Password
Table of Contents
  • Accessing Drop-Down Options
  • Editing an Option
  • Option Sort Order
  • Adding a New Option
  • Deleting an Option (Archiving)
  • Multi-Level Drop-Downs
Symbiant System White Logo

20-22 Wenlock Road

London

N1 7GU

Linkedin
Telephone Numbers
  • UK - 020 8895 6410
  • Support - 020 3821 1993 option 2
  • USA - 347 991 7130
Information
  • Home
  • Knowledge Base
  • Symbiant Website
  • Submit A Ticket
  • Change Requests
  • Support Staff Login

Copyright © 2023 Symbiant All Rights Reserved - Risk, Audit and Compliance Management Software

We use cookies on our website to give you the most relevant experience by remembering your preferences and repeat visits. By clicking “Accept All”, you consent to the use of ALL the cookies. However, you may visit "Cookie Settings" to provide a controlled consent.
Cookie SettingsAccept All
Manage consent

Privacy Overview

This website uses cookies to improve your experience while you navigate through the website. Out of these, the cookies that are categorized as necessary are stored on your browser as they are essential for the working of basic functionalities of the website. We also use third-party cookies that help us analyze and understand how you use this website. These cookies will be stored in your browser only with your consent. You also have the option to opt-out of these cookies. But opting out of some of these cookies may affect your browsing experience.
Necessary
Always Enabled
Necessary cookies are absolutely essential for the website to function properly. These cookies ensure basic functionalities and security features of the website, anonymously.
CookieDurationDescription
cookielawinfo-checkbox-analytics11 monthsThis cookie is set by GDPR Cookie Consent plugin. The cookie is used to store the user consent for the cookies in the category "Analytics".
cookielawinfo-checkbox-functional11 monthsThe cookie is set by GDPR cookie consent to record the user consent for the cookies in the category "Functional".
cookielawinfo-checkbox-necessary11 monthsThis cookie is set by GDPR Cookie Consent plugin. The cookies is used to store the user consent for the cookies in the category "Necessary".
cookielawinfo-checkbox-others11 monthsThis cookie is set by GDPR Cookie Consent plugin. The cookie is used to store the user consent for the cookies in the category "Other.
cookielawinfo-checkbox-performance11 monthsThis cookie is set by GDPR Cookie Consent plugin. The cookie is used to store the user consent for the cookies in the category "Performance".
viewed_cookie_policy11 monthsThe cookie is set by the GDPR Cookie Consent plugin and is used to store whether or not user has consented to the use of cookies. It does not store any personal data.
Analytics
Analytical cookies are used to understand how visitors interact with the website. These cookies help provide information on metrics the number of visitors, bounce rate, traffic source, etc.
SAVE & ACCEPT
Loading...

Insert/edit link

Enter the destination URL

Or link to existing content

    No search term specified. Showing recent items. Search or use up and down arrow keys to select an item.