
 Doc Summary

This article shows you how to build a schedule that emails a reminder when something on a record is overdue, for example a risk review that has passed its date, copying in the Risk Admins.
Applies to: System administrators (
adminrole) · Module: Set up > Schedules
Before you start #
- Most modules already have shipped overdue reminders named
<module>-...-overdue-generic(overdue, and overdue by 3, 7, 14 days and 1 month). They arrive inactive. Activating one is often all you need: see Activating and Deactivating an Automated Email. - The example below matches the shipped
register-risks-risk-review-overdue-generic.
Accessing Schedules #
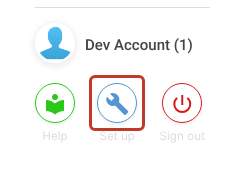
- Click the Set up spanner at the bottom left of the screen.
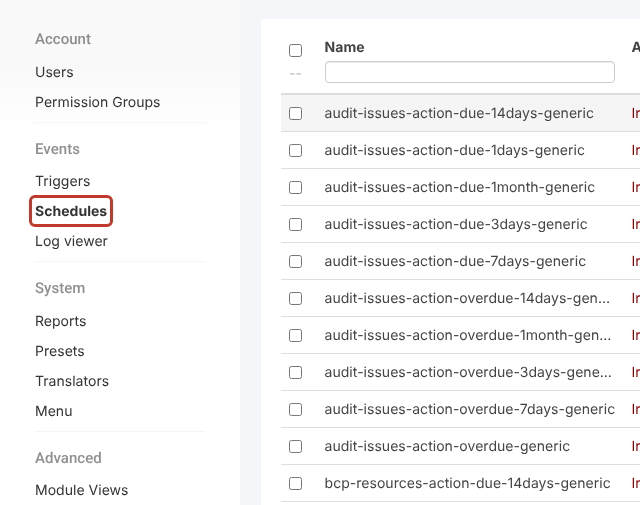
- In the Set up menu, under Events, click Schedules.
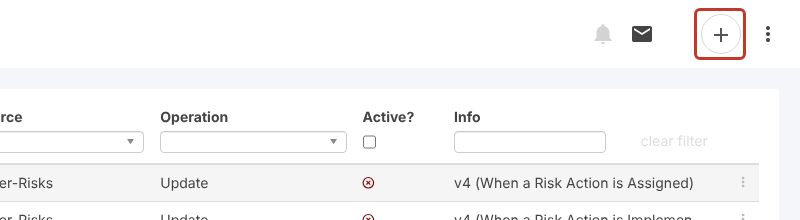
- Click the + icon at the top right.
Schedule Details #
- In Name, enter a name with no spaces, for example
register-risks-review-overdue-company.
- Leave Start and End as they are (both today’s date). Changing them can stop the schedule running.

- Leave Active? unticked while you build and test.
Setting When the Schedule Runs (Recurring) #
The Recurring grid sets when the schedule runs. Tick values in the columns Month, Day of Month, Day of Week, Hour and Minute. Columns left empty mean “every”.
Critical: Times are in UTC (Coordinated Universal Time), not your local time. Tick at least one Hour and/or Minute, or the schedule won’t run.
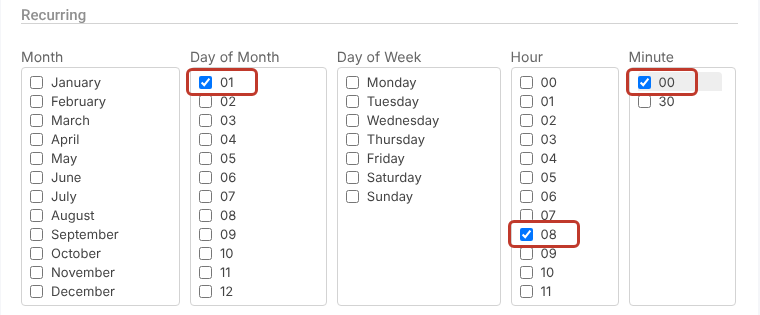
Example 1: The 1st of Every Month at 08:00 #
Tick 01 under Day of Month, 08 under Hour and 00 under Minute.
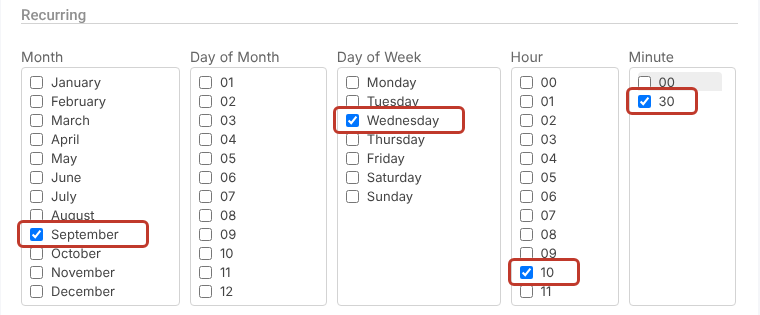
Example 2: Every Wednesday in September at 10:30 #
Tick September under Month, Wednesday under Day of Week, 10 under Hour and 30 under Minute.
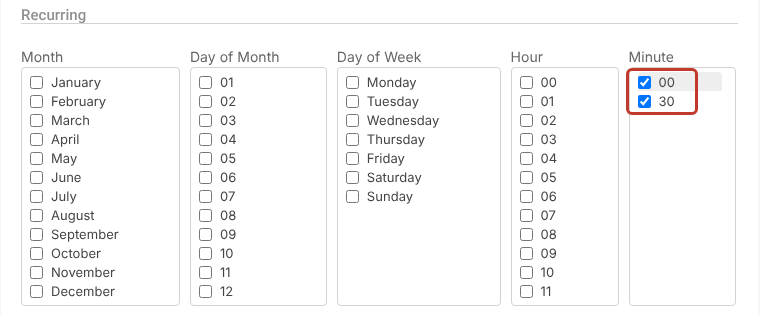
Example 3: Every 30 Minutes #
Tick 00 and 30 under Minute and leave the other columns empty.
Note: The shipped due and overdue reminders run once a day at 09:00 UTC (09 under Hour, 00 under Minute).
The Function Chain #
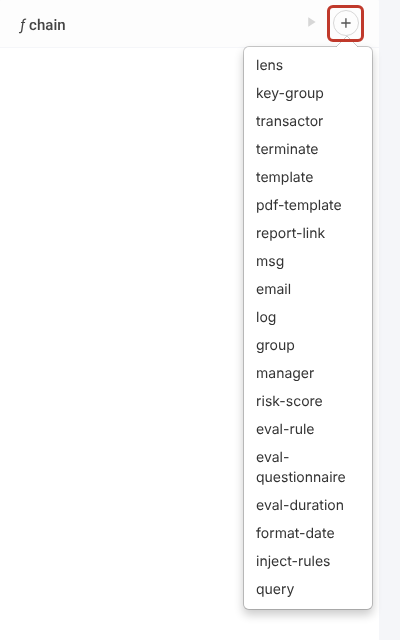
A schedule’s ƒ chain works like a trigger’s: interceptors run from top to bottom. Click the + at the top of the ƒ chain panel to add one.
The shipped reminder schedules all use this chain, and the steps below follow it:
query → template (reminder tag) → tag-filter → manager (optional) → format-date → template (the email) → email → log → tag-record
Adding the Query Interceptor #
The query interceptor finds the records the reminder is about each time the schedule runs. If it finds none, the schedule stops until next time.
- Add a query interceptor and choose the module in Model, for example Register-Risks.
- Under Where, click AND to add a condition, then click the field name to choose the field, for example Review Date.
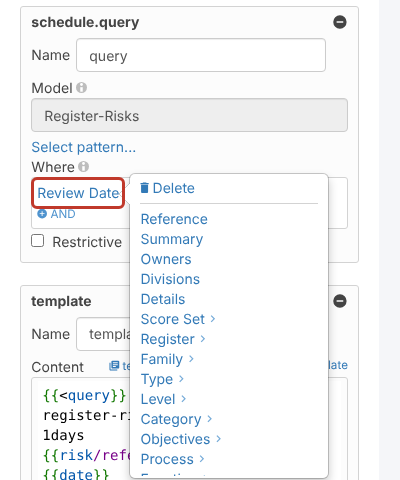
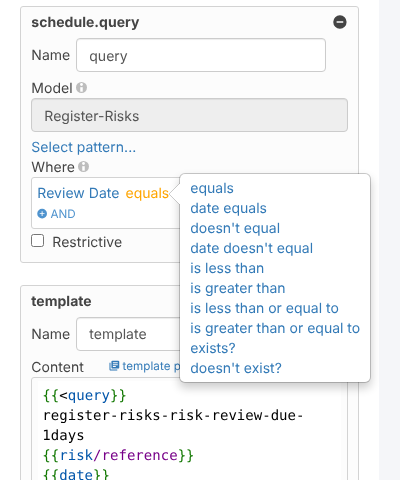
- Click the operator (for example equals) to change it. Options include date equals, is less than, is greater than, exists? and doesn’t exist?.
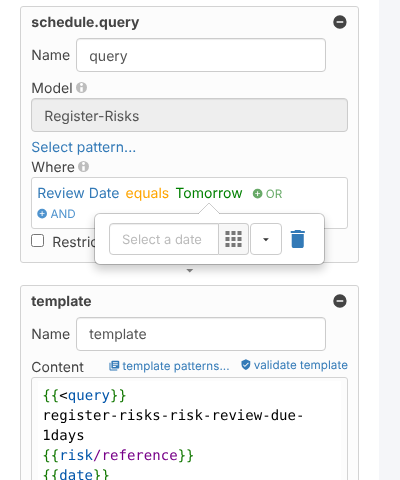
- Click the value to set the date to compare against.
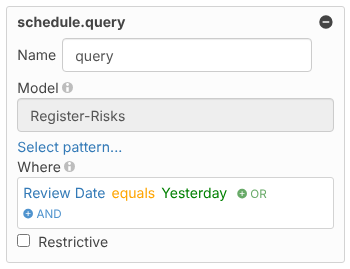
For an overdue reminder the condition reads Review Date equals Yesterday: the day after the date passes, the record is emailed once. For “overdue by 7 days”, compare with the date 7 days ago.
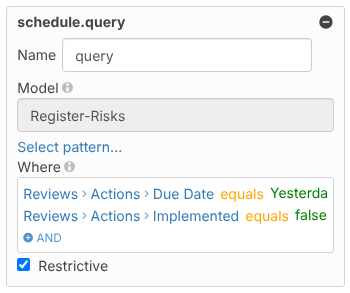
For actions, add a second condition so implemented actions are left out. The shipped action reminder checks Due Date equals Yesterday AND Implemented equals false.
Adding the Reminder Tag (template and tag-filter) #
A schedule runs again and again, so it needs to remember which records it has already emailed. It does this with a tag.
- Add a template interceptor whose content is a unique tag for each record and day: the opening
{{<query}}, a name for the reminder, the record reference,{{date}}and the closing{{>query}}.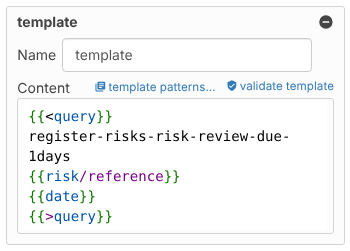
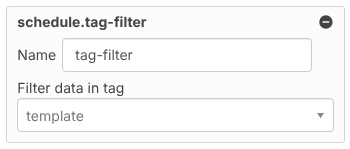
- Add a tag-filter interceptor and set Filter data in tag to that template. Records already tagged are skipped.
Adding the Manager Interceptor (Optional) #
To copy in users with a role, such as the Risk Admins, add a manager interceptor: Data source = query, Attribute = generic/owners, Role = for example risk_admin. Then add Cc: {{<generic/owners}}{{<manager}}{{sm.user/name}}, {{>manager}}{{>generic/owners}} to the email template.
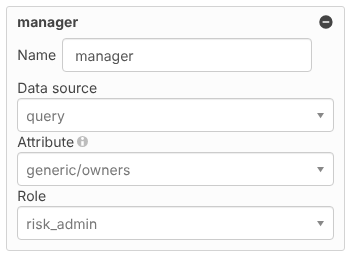
Critical: Don’t choose the plain
adminrole. Use the module role (for examplerisk_admin).
Adding the Date Format (format-date) #
- Add a format-date interceptor so dates in the email read well, for example
dd MMMM yyyy(21 October 2026).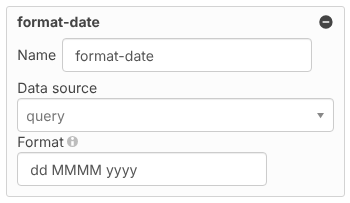
Adding the Email Template #
- Add a second template interceptor for the email itself:
From:,To:, optionalCc:,Subject:, a blank line and the body. Wrap it in the data source above it, here{{<format-date}}…{{>format-date}}.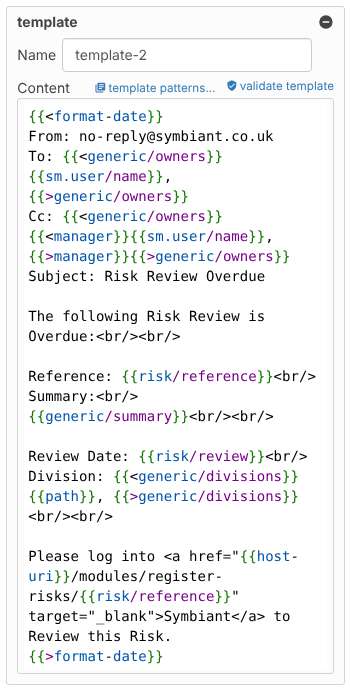
- Use the recipient codes from Editing an Automated Email Reminder – Sending to a Record User (Scheduler), and markers such as
{{risk/reference}},{{generic/summary}}and{{risk/review}}for record data.
Note: The query returns every matching record. Each record gets its own email when the template is wrapped in the query’s data block as above. If you build a template that lists records in one message, end each record’s section with
<EOM>(end of message) to split them into separate emails.
Adding the Email, Log and tag-record Interceptors #
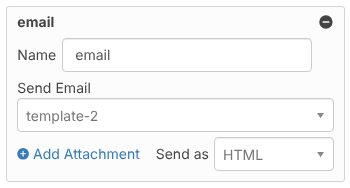
- Add an email interceptor: Send Email = the email template, Send as = HTML.
- Add a log interceptor: Log = Emails, a Log Group with no spaces (for example
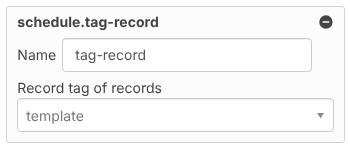
Register-Risks), and the email template as Info line template. - Add a tag-record interceptor last and set it to the tag template. This records the tag so tomorrow’s run doesn’t email the same record again.
Saving and Testing #
- Click Save at the top right.

- To test, make a test record that matches the query, tick Active? and save. The schedule runs at its next recurring time.
- The ▶ (play) button at the top of the ƒ chain runs the schedule straight away.

Critical: The ▶ button and an active schedule send real emails to every matching record’s recipients, not only your test record. Check the query and the recipients first. Sent emails appear in Set up > Log viewer.