
 Doc Summary

This article shows you how to set when a schedule (time-based automated email) runs.
Applies to: System administrators (
adminrole) · Module: Set up > Schedules
Opening the Schedule #
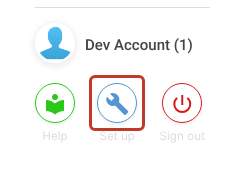
- Click the Set up spanner at the bottom left of the screen.
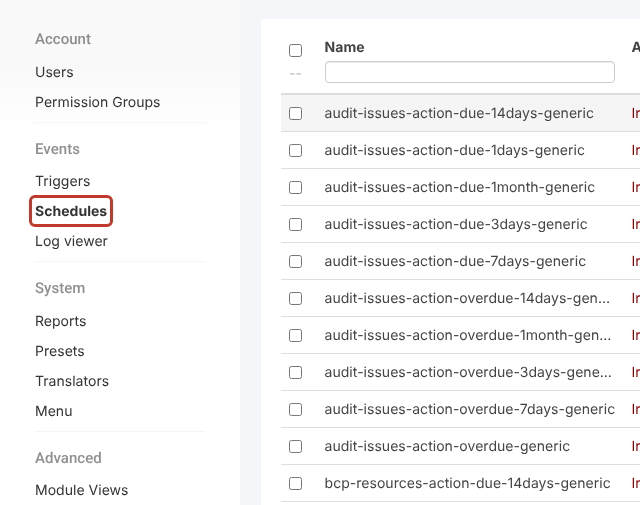
- In the Set up menu, under Events, click Schedules.
- Type part of the name in the Name filter box (for example
register-risks-risk-review), then click the schedule.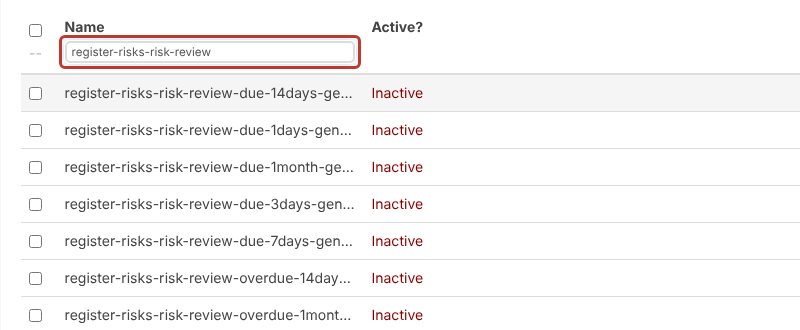
What Each Column Means #
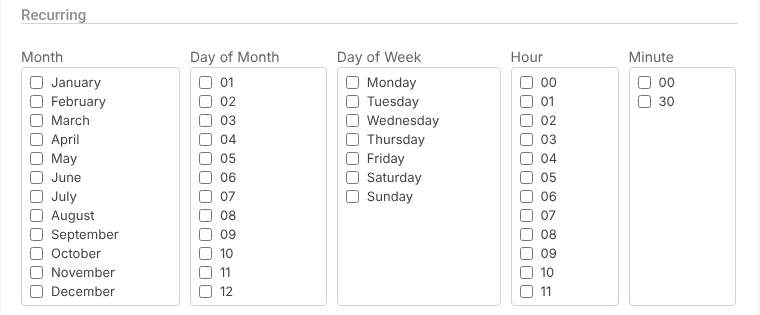
- Month: the months it runs in. For example, tick June and December to run twice a year (also tick a Day of Month, an Hour and a Minute).
- Day of Month: the day(s) of the month, for example 03 for the 3rd of every month.
- Day of Week: the weekday(s), for example Sunday.
- Hour: the hour(s) of the day, 00 to 23. Scroll the list for later hours.
- Minute: on the hour (00) or half past (30).
Setting When the Schedule Runs (Recurring) #
The Recurring grid sets when the schedule runs. Tick values in the columns Month, Day of Month, Day of Week, Hour and Minute. Columns left empty mean “every”.
Critical: Times are in UTC (Coordinated Universal Time), not your local time. Tick at least one Hour and/or Minute, or the schedule won’t run.
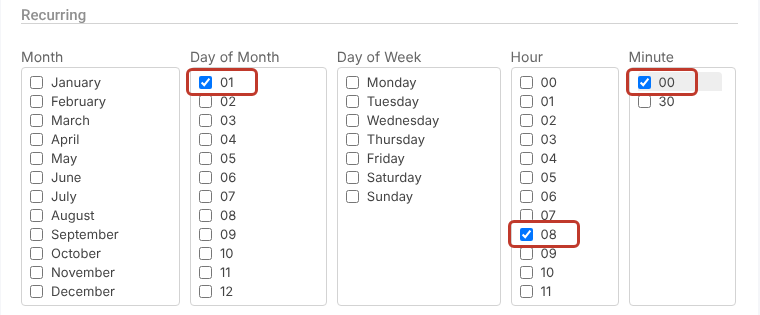
Example 1: The 1st of Every Month at 08:00 #
Tick 01 under Day of Month, 08 under Hour and 00 under Minute.
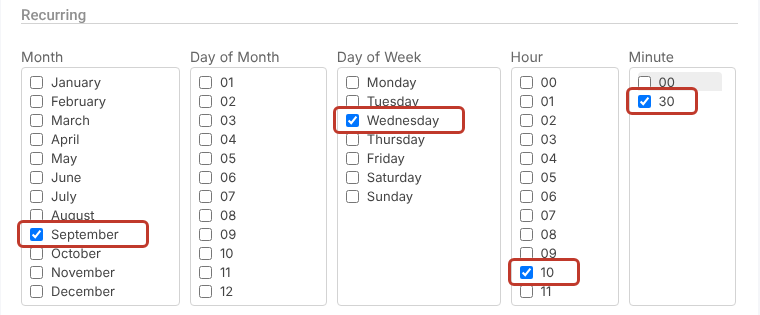
Example 2: Every Wednesday in September at 10:30 #
Tick September under Month, Wednesday under Day of Week, 10 under Hour and 30 under Minute.
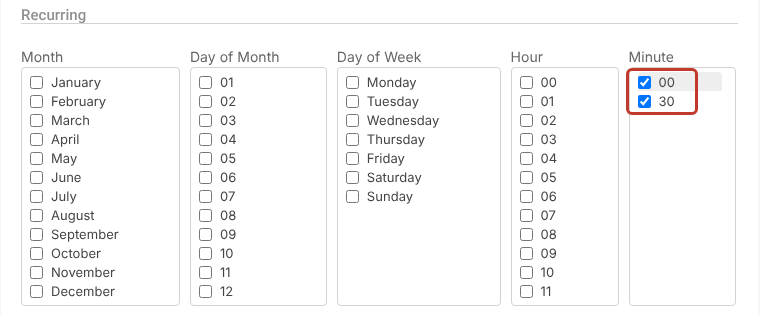
Example 3: Every 30 Minutes #
Tick 00 and 30 under Minute and leave the other columns empty.
Note: The shipped due and overdue reminders run once a day at 09:00 UTC (09 under Hour, 00 under Minute).
Saving the Schedule #
- Click Save at the top right.

Note: Leave the Start and End dates next to Active? as they are. Changing them can stop the schedule running.